What is it all about? [^]
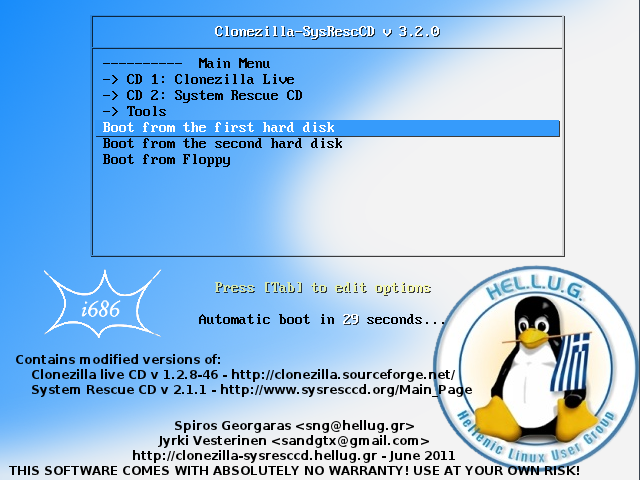
Clonezilla-SysRescCD is a Linux multi boot backup/restore and rescue CD, combining Clonezilla Live and System Rescue CD in one CD. It is released under the GNU General Public License (GPL).
Why one more Linux live CD? you might ask
Well, I started this project because I wanted to have a rescue CD that would be as self-contained as possible, using my favorite tools. My goals are to have:
- A backup/restore system
I have chosen Clonezilla Live for this, as it is flexible enough to fulfill my needs. Furthermore, it makes it possible to create automated restore CDs/DVDs. This way, restoring a system will be fast and easy enough for anyone to perform (even people with minimum technical knowledge). - A rescue system
I have chosen SystemRescueCD for this, as it is generally highly appreciated.
SystemRescueCD is a live CD with a GUI, based on gentoo, which provides tools like GParted, the graphical partition tool, GNU-Parted, an excellent text based partitioning tool, TestDisk, a data recovery tool, Clam-AntiVirus, a free Anti-Virus sofware, Partimage, Python, Perl, file system, networking and archiving tools, editors etc. - Both of them in just one disk
The only way to do this was to create a Multi Boot CD.
Enhanced features [^]
Enhancements to Clonezilla Live
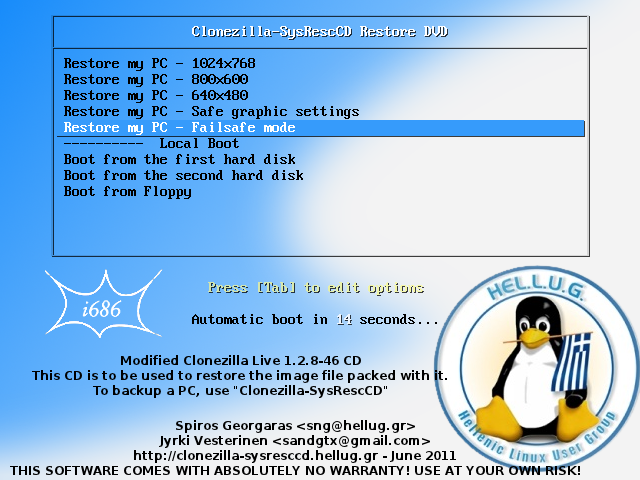
- Automated restore DVDs can be easily created, so that anybody can perform a system restore operation (even people with minimum technical knowledge). All the necessary files for the creation of the DVD are included in Clonezilla-SysRescCD.
- A set of shell scripts make it easier to restore an image file to a location (disk or partition) different than the one originally backed up.
Other enhancements
- Part of Clonezilla-SysRescCD's web site is included in the CD, so that help is always available.
Versions [^]
| Release table | |||
| Date | Version | Clonezilla Live Version | SystemRescueCD Version |
| XX/XX/10 | 3.2.0 | 1.2.8-46 (mod) | 2.1.1 |
| 15/09/10 | 3.1.0 | 1.2.5-35 (mod) | 1.6.0 |
| 02/07/08 | 2.6.0 | 1.1.0-8 (mod) | 1.0.4 (mod) |
| 11/04/08 | 2.5.0 | 1.0.10-8 (mod) | 1.0.1 (mod) |
| 24/03/08 | 2.4.0 | 1.0.9-19 (mod) | 1.0.0 (mod) |
| 07/03/08 | 2.3.0 | 1.0.9-10 (mod) | 1.0.0 (mod) |
| 22/02/08 | 2.2.0 | 1.0.9-10 (mod) | 0.4.3 (mod) |
| 22/01/08 | 2.1.0 | 1.0.7-18 (mod) | 0.4.3 (mod) |
| 11/12/07 | 1.4.0 | 1.0.7-18 (mod) | 0.4.2 (mod) |
| 03/11/07 | 1.3.0 | 1.0.5-8 (mod) | 0.4.1 (mod) |
| 07/10/07 | 1.2.0 | 1.0.5-8 (mod) | 0.4.0 (mod) |
| 24/09/07 | 1.1.0 | 1.0.5-7 (mod) | 0.3.8 (mod) |
| 06/09/07 | 1.0.0 | 1.0.3-21 (mod) | 0.3.8 (mod) |
| 12/08/07 | 0.2 | 1.0.3-21 (mod) | 0.3.7 (mod) |
| 24/07/07 | 0.1.1 | 1.0.3-18 | 0.3.7 |
| 23/07/07 | 0.1 | 1.0.3-18 | 0.3.7 |
Changelog [^]
| Version | Package/CD | Comments |
| 3.2.0 | CD |
- Clonezilla Live updated to version 1.2.8-46 - SystemRescueCD updated to version 2.1.1 - Fixed the splash image installation bug present in 3.1.0 Also, a filename relative to /home/partimag, can now be used - Script imginfo can display extended info (command line parameter -e) Extended info is: image size and disk model |
| Package |
- Added -d command parameter to scrpit create-clonezilla-sysresccd This way the temporary and output folder can be specified - Using $HOME instead of /root in scrpit create-clonezilla-sysresccd - Script create-clonezilla-sysrescc can now download the original ISO files (parameter -g), making easier to build Clonezilla-SysRescCD | |
| 3.1.0 | CD |
- Clonezilla Live updated to version 1.2.5-35 - SystemRescueCD updated to version 1.6.0 - Three Clonezilla-SysRescCD flavours are now available, one for each architecture (more information) - Super Grub Disk updated to version 0.9799 - Added Super Grub Disk 2 version 1.98s - Smart Boot Manager was added to the Tools section - Added restorecd/ and docs/ to the squashfs file of Clonezilla distro. This way all items are always available (even when booting to RAM) - Most operations are now executed through the TUI (Text User Interface) - Major site and documentation update (thanks to Jyrki Vesterinen) |
| Package | - Added auto mode (parameter -a) to script create-clonezilla-sysresccd | |
| 2.6.0 | CD |
- Clonezilla Live updated to version 1.1.0-8 - SystemRescueCD updated to version 1.0.4 - Super Grub Disk updated to version 0.9726 |
| 2.5.0 | CD |
- Clonezilla Live updated to version 1.0.10-8 - SystemRescueCD updated to version 1.0.1 - Super Grub Disk updated to version 0.9701 |
| 2.4.0 | CD |
- Clonezilla Live updated to version 1.0.9-19 |
| 2.3.0 | CD |
- SystemRescueCD updated to version 1.0.0 - Added two command line parameters to ocs-iso, used in auto restore DVD mastering. More info: Working with a USB keyboard |
| Package |
- Fixed the create-clonezilla-sysresccd installation problem Thanks to Chris Rehder | |
| 2.2.0 | CD |
- Clonezilla Live updated to version 1.0.9-10 - Updated script reloc-img to support remote images (through samba and nfs) |
| Package |
- Added patch-clonezilla-sysresccd, a script that can be used to customize an existing Clonezilla-SysRescCD ISO file More info: Using patch-clonezilla-sysresccd | |
| 2.1.0 | CD |
- SystemRescueCD updated to version 0.4.3 - Super Grub Disk updated to version 0.9677 |
| 1.4.0 | CD |
- A script to help relocate a Clonezilla image file during restoration hase been added to Clonezilla Live. The script (called reloc-img) uses a curses like interface, which is similar to Clonezilla's interface More info: Restoring to a different location |
| 1.3.0 | CD |
- Changed the splash screen tool selection interface A navigation menu scheme has been adopted - Removed ranish.img from the CD The Ranish Partition Manager has been integrated into FreeDos This is because of the fact that Ranish Partition Manager would not execute as a standalone floppy image - Added Super Grub Disk to the available tools The floppy image provided by "Super Grub Disk" (english version) has been added to the source tarball - Script continue-multi-cd (SysRescCD) updated to v 2.0.0 Use "continue-multi-cd -h" to see the new interface - Fixed a minor bug in script what-cd |
| Package |
- All the files needed for CD creation have been included in the source tarball. This way the user will only have to download the debian live ISO file, in order to create Clonezilla-SysRescCD. The debian live ISO file has not been included because of its size (~ 79 MB), which would make the source tarball too big. The files can be fount in /root/.clonezilla-sysresccd/files - All cfg files have been moved to /root/.clonezilla-sysresccd/files If you are upgrading from a previous version, please delete/move these files, and adjust your configuration files (conf files) - A new variable has been inserted to the configuration files (named DebianLiveFolder in clonezilla-sysresccd.conf and DebianLiveFolderP in profiles.conf). This variable should point to the folder where the debian live ISO has been saved. If you are upgrading from a previous version, please adjust your configuration files (conf files) - Added support to script create-clonezilla-sysresccd for compressed (tar.gz) isolinux configuration files, in order to implement menus | |
| 1.2.0 | CD | - Added script continue-multi-cd to SystemRescueCD This script makes it easy to continue a multi session CD |
| 1.1.0 | CD | - Minor changes (cfg files) |
| 1.0.0 | - |
- Moved to version 1.0.0 in order to eliminate any missunderstanding about the development status of Clonezilla-SysRescCD |
| CD |
- Added the options -A and -W to script ocs-iso (Clonezilla Live). Syntax: /opt/drbl/sbin/ocs-iso -A "ocs-rs command" /opt/drbl/sbin/ocs-iso -W "ocs-rs command" [image file] Both options set up the restore CD/DVD for automatic image restoration. The difference is that when using the -W option the image [image file] is appended in the ISO file (maximum 4.4BG). When -A is used, the image file will be appended to the CD/DVD, after the ISO file created by this command is burnt, using growisofs -M ... (maximum 8GB). - Added the option -O to script ocs-iso (Clonezilla Live). Specifies the ISO file name to use when -A, -W options are used. - Added the options -V and -P to script ocs-iso (Clonezilla Live). The user creating a restore CD/DVD can now specify its Volume ID and Publisher ID, respectively. - Added the option -I to script ocs-iso (Clonezilla Live). Specifies the user selectable menu item title of the main screen of a restore CD/DVD. Applicable only with options -W and -A - Added the script what-cd to sysresccd. This script will identify the CDs present on a pc, and report the device name of the writer (if any) - Added a copy of the Clonezilla-SysRescCD site to the CD. In this way the documentation will be available at all times | |
| Package |
- Added -x [script] option This way you can write a BASH script that will be executed just before mastering the "Clonezilla-SysRescCD" | |
| 0.2 | CD |
- clonezilla-sysresccd contains customized versions of the original CDs More info in page Custom CDs |
| Package |
- Fixed a bug that would appear when option -b would be used without any other options. Then create-clonezilla-sysresccd would not be able to get the ISO file name | |
| 0.1.1 | Package |
- Build system upgrade use ./configure to upgrade the program use ./configure --enable-fullInstall to install it - Fixed a potential script installation bug - Normal user can get help - Minor changes |
| 0.1 | - Initial release |
Can I help? [^]
Yes, of course you can. If you have:
- a script I can add to Clonezilla Live or SystemRescueCD, don't hesitate to send it to me.
You can have a look at "Clonezilla-SysRescCD own scripts" to see what type of scripts might be interesting. - used Clonezilla Live nfs mode, or any of the tools provided by SystemRescueCD, you can write a guide.
I will add it to the site (and the documentation present on the CD). Please keep in mind that this CD may be used by less experienced users, so make it as detailed as possible.
Contact us [^]
If there's anything you want to say about Clonezilla-SysRescCD, go ahead and send me (Spiros) a message. If there's anything you have to say about the documentation in particular, you can contact Jyrki directly.
Mailing lists [^]
There are two mailing lists available for Clonezilla-SysRescCD:
- Clone-sysresccd-announce
This is the Clonezilla-SysRescCD new releases announcement list. Please do not post there. - Clone-sysresccd-general
This is the general discussion list of Clonezilla-SysRescCD.
If you have any questions about Clonezilla Live, please use its Mailing lists or Forums.
If you have any questions about SystemRescueCD, please use its Forums.
License [^]
This project is published under the terms of GNU General Public License as published by the Free Software Foundation.
Credits [^]
I would like to thank:
- The creators of SystemRescueCD and Clonezilla Live
- Eleftherios Kosmas for publishing the v 0.1 torrent
- George Keramidas and <<V13>> from the linux greek users mailing list, who helped fixing a bug that would make the creation of the 8GB Restore DVD impossible.
- Chris Rehder for reporting the create-clonezilla-sysresccd installation problem in v 2.2.0 and his overall assistance
- Manfred Hantl for reporting and fixing the windows USB installation problem of version 2.6.0
- Everyone who seeds the torrent, as it is not possible for me to be online at all times
Special thanks to
- Jyrki Vesterinen, documentation contributor.
Most of these pages have been updated / written by him.
Installation to USB made easy [^]
Until recently installing Clonezilla-SysRescCD on a USB disk would not be such a great idea, because of its size. But since USB devices become cheaper and cheaper, it is an interesting alternative.
Starting with version 3.1.0, Clonezilla-SysRescCD provides an iso file that's ISO-Hybrided. This means (as we read at the isolynux site) that
"the iso file can be booted from either CD-ROM or from a device which BIOS considers a hard disk or ZIP disk, e.g. a USB key or similar. This image can then be copied using any raw disk writing tool (on Unix systems, typically "dd" or "cat") to a USB disk, or written to a CD-ROM using standard CD burning tools.
The ISO 9660 filesystem is encapsulated in a partition (which starts at offset zero, which may confuse some systems.) This makes it possible for the operating system, once booted, to use the remainder of the device for persistent storage by creating a second partition."
 |
Incorrect use of any raw disk writing tool could cause your operating system (GNU/Linux / Windows) not to boot. Confirm the command before you run it. |
So, from any linux box, assuming Clonezilla-SysRescCD iso file is in your home directory, and your USB device name is sdc4, you just execute the commands:
umount /dev/sdc4
dd if=~/clonezilla-sysresccd-full-mod-3.2.0.iso of=/dev/sdc bs=512
And that's it. Your usb device is ready to boot!!!
Installing the "hard" way [^]
If the "easy" way does not work there is an alternative; you will use the Clonezilla-SysRescCD ISO file (or CD) to copy and modify a couple of files on the USB disk, and finally make it bootable, using syslinux and its configuration file syslinux.cfg.
|
Incorrect use of syslinux could cause your operating system (GNU/Linux / Windows) not to boot. Confirm the command before you run it. |
The only thing that's important is that your USB disk must contain a VFAT (Windows 98 or DOS) file system. If this is not the case, refer to the section "Troubleshooting", to find out how you can format it, before copying files to it.
The bootable USB disk creation procedure can be performed either from Linux or Windows.
 |
If you want to create a bootable USB flash drive for this version or later, remember to use the syslinux command from syslinux 3.71 or later. Otherwise the boot menu won't work. |
Installation from Linux [^]
There are two ways you can proceed, if you are going to use Linux to perform the USB installation, either using a running linux box, or using Clonezilla-SysRescCD.
I will assume that you have saved clonezilla-sysresccd-full-mod-3.1.0.iso in your home directory (~).
Using a linux box [^]
If you already have a linux box up and running, you can use it to create your Clonezilla-SysRescCD USB, without even having to burn it to CD beforehand. The only thing here is that you have to have syslinux installed.
I will assume that your CD drive is /dev/sr0 and that your USB device is /dev/sdc4. You may have to change any of them to reflect your system configuration.
Boot into linux, connect your USB device and execute the following commands:
mkdir /mnt/mycd
mount ~/clonezilla-sysresccd-full-mod-3.1.0.iso /mnt/mycd -o loop
mkdir /mnt/usbdevice
mount /dev/sdc4 /mnt/usbdevice
cp -r /mnt/mycd/* /mnt/usbdevice
umount /mnt/mycd; rmdir /mnt/mycd
cd /mnt/usbdevice
cp syslinux/*.cfg isolinux
cp syslinux/*.png isolinux
rm -rf syslinux
mv isolinux syslinux
|
Since you are using any linux box to complete this procedure, you have to use the syslinux installation provided by this linux box. Otherwise, you will probably end up with an unbootable device... |
First thing you have to do is find where syslinux is installed. The best way to do that is look for a file named vesamenu.c32. You can use locate, find, or any other distribution specific tool for that. In Debian (and its derivatives like Ubuntu, LMDE etc.) this file is under /usr/lib/syslinux, so I'll just use that for the following code.
cd syslinux
for f in *.c32
do
cp -v /usr/lib/syslinux/$f .
done
cd ..
In either case, unmount the device and delete the mount point (directory).
cd; umount /dev/sdc4
rmdir /mnt/usbdevice
Finally make your USB device bootable, by executing
syslinux /dev/sdc4
and you are done.
Using Clonezilla-SysRescCD [^]
If you already burnt Clonezilla-SysRescCD to CD, you can use it to create your Clonezilla-SysRescCD USB.
I will assume that your CD drive is /dev/sr0 and that your USB device is /dev/sdc4. You may have to change any of them to reflect your system configuration.
Boot SystemRescueCD using the option To RAM, and when it is fully loaded, execute the following commands:
mkdir /mnt/mycd
mount /dev/sr0 /mnt/mycd
mkdir /mnt/usbdevice
mount /dev/sdc4 /mnt/usbdevice
cp -rv /mnt/mycd/* /mnt/usbdevice
umount /mnt/mycd
cd /mnt/usbdevice
cp syslinux/*.cfg isolinux
cp syslinux/*.png isolinux
rm -rf syslinux
mv isolinux syslinux
cd; umount /dev/sdc4
Finally make your USB device bootable, by executing
syslinux /dev/sdc4
and you are done.
Installation from Windows [^]
Installing Clonezilla-SysRescCD from Windows is as easy as it is in Linux. You have to burn Clonezilla-SysRescCD to CD or use a CD/DVD ROM emulator software like Daemon Tools to mount the ISO file.
I will assume that your USB device is drive K: and your CD drive or mounted ISO file is drive
D:. You may have to change any of them, in order to reflect your system configuration.
You will have to
- Copy all files from drive D: (CD or mounted ISO file) to drive K: (USB disk)
- Copy all cfg files from K:\syslinux to K:\isolinux
- Copy all png files from K:\syslinux to K:\isolinux
- Delete the folder K:\syslinux
- Rename K:\isolinux to K:\syslinux
Now all you have to do is make your USB disk bootable. In order to do that you have to open a DOS window (in Windows XP press "Start / Run " and type cmd). Then type at DOS prompt:
K:
cd utils/bootprog
syslinux -ma K:
Booting from USB [^]
Before trying to boot from your USB device, you have to set your boot device at your BIOS. This means you have to reboot having your USB device connected, get into your BIOS (usually pressing DEL) and make the appropriate settings in the BOOT section.
Booting Clonezilla Live should not be a problem. Just select the desired option and press ENTER to boot.
Booting SystemRescueCD has been made equally simple with SystemRescueCD v 1.0.0, so you shouldn't have any problem (option cdroot is not required any more).
If you have any problems here, you may try adding any of these boot parameters:
usbstick
doscsi
Troubleshooting [^]
Whether you can successfully boot from a USB disk or not, depends mainly on your BIOS. Chances are that you will not be able to boot on an old computer, with an old (and possibly buggy) BIOS. So I would recommend testing your Clonezilla-SysRescCD USB on a new computer.
I can't boot (I don't even see the splash screen)
or Clonezilla Live does not boot
The first thing you should do is double check your BIOS settings. Reboot having your USB device connected, get into your BIOS (usually pressing DEL) and make the appropriate settings in the BOOT section.
If you are on linux, check that the partition on the USB disk is active (bootable), executing:fdisk -l /dev/sdc
You should get something similar to this:
Disk /dev/sdc: 4043 MB, 4043309056 bytes
125 heads, 62 sectors/track, 1018 cylinders, total 7897088 sectors
Units = sectors of 1 * 512 = 512 bytes
Sector size (logical/physical): 512 bytes / 512 bytes
I/O size (minimum/optimal): 512 bytes / 512 bytes
Disk identifier: 0x596bbd85
Device Boot Start End Blocks Id System
/dev/sdc1 * 63 1461914 730926 b W95 FAT32
If the partition is not active (no asterisk), execute:fdisk /dev/sdc
and issue "Command: " a (toggle a bootable flag) and "Partition number:" 4 (for /dev/sdc4).
If you are on Windows, this is taken care of by syslinux (parameters -ma).
If you still have problems booting, you should try to executesyslinux -s /dev/sdc4
from Linux, or
syslinux -sma K:
from Windows (from folder K:syslinux).
syslinux man page reads:(Option) -s
Install a "safe, slow and stupid" version of syslinux. This version may work
on some very buggy BIOSes on which syslinux would otherwise fail. If you find
a machine on which the -s option is required to make it boot reliably, please
send as much info about your machine as you can, and include the failure mode.I still can't boot
In this case you will have to format your USB disk.
If you are using linux to perform the installation, execute the command:mkdosfs -F 16 /dev/sdc4
to create a FAT16 file system, or
mkdosfs -F 32 /dev/sdc4
to create a FAT32 file system.
When you are done go back to section "Installation from Linux".
If you are on Windows, you should download the HP-USB Format tool, install it and format your USB drive using the Fat or Fat32 option. This program can be used to format USB devices that won't boot properly when formatted with Windows format tool.
When you are done go back to section "Installation from Windows".- I still can't boot (after formating)
Things are getting tough!!! Try to format your USB disk using the option you did not use previously. So, if you have created a FAT32 file system, create a FAT16 file system this time, and recreate Clonezilla-SysRescCD on USB.
If nothing works, you are out of luck; you will not be able to use Clonezilla-SysRescCD USB on this computer... If you do manage to boot it, please send me a message. - SystemRescueCD does not boot
Ok, you have managed to get to the splash screen and successfully booted Clonezilla Live. But you still can't boot SystemRescueCD.
Refer to section Booting from USB to find out the boot parameters you can use with SystemRescueCD.
Customizing sysresc.cfg [^]
As stated previously, Clonezilla-SysRescCD USB is booted by syslinux through its configuration file syslinux.cfg. This file loads sysresc.cfg in order to boot SystemRescueCD.
If you have to specify any additional boot parameters for SystemRescueCD, you may want to write these changes to the configuration file, so that you don't have to insert them by hand every time.
The procedure to do that is the following:
Boot SystemRescueCD (or if that's not possible yet, boot Clonezilla Live and get to the command line) using the option To RAM, and when it is fully loaded, execute the following commands:
mkdir /mnt/usbdevice
mount /dev/[device] /mnt/usbdevice
cd /mnt/usbdevice
cp sysresc.cfg sysresc.bak
sed 's|scandelay=5|scandelay=x [additional params]|' \
sysresc.cfg > sys.cfg
mv sys.cfg sysresc.cfg
cd; umount /dev/[device]
syslinux /dev/[device]
reboot
where x is a number from 1 to 10.
After executing these commands, you will have a new sysresc.cfg file, and a backup file called sysresc.bak (in case things go wrong).
If, for example, you want to increase the device scan delay to maximum, the above commands would become:
mkdir /mnt/usbdevice
mount /dev/sdc1 /mnt/usbdevice
cd /mnt/usbdevice
cp sysresc.cfg sysresc.bak
sed 's|scandelay=5|scandelay=10|' sysresc.cfg > sys.cfg
mv sys.cfg sysresc.cfg
cd; umount /dev/sdc1
syslinux /dev/sdc1
reboot
If, in addition to that, you had to use the boot parameter usbstick, then it would be:
mkdir /mnt/usbdevice
mount /dev/sdc1 /mnt/usbdevice
cd /mnt/usbdevice
cp sysresc.cfg sysresc.bak
sed 's|scandelay=5|scandelay=10 usbstick|' sysresc.cfg > sys.cfg
mv sys.cfg sysresc.cfg
cd; umount /dev/sdc1
syslinux /dev/sdc1
reboot
In case something goes wrong with your new settings, you can always rename sysresc.bak to sysresc.cfg, either from linux or Windows.
Using the extra space [^]
If your usb device is more than 450MB in size, the above procedure will leave the remaining space unused. To verify it, execute the command:
fdisk -l /dev/sdc
You should get something similar to this:
Disk /dev/sdc: 4043 MB, 4043309056 bytes
125 heads, 62 sectors/track, 1018 cylinders, total 7897088 sectors
Units = sectors of 1 * 512 = 512 bytes
Sector size (logical/physical): 512 bytes / 512 bytes
I/O size (minimum/optimal): 512 bytes / 512 bytes
Disk identifier: 0x596bbd85
Device Boot Start End Blocks Id System
/dev/sdc1 * 63 1461914 730926 b W95 FAT32
As you can see, we are currently using 1461914 out of 7897088 sectors of the disk. The remaining disk space (~3GB) can still be used, to save backups, for example, executing the following commands:
# fdisk /dev/sdc
command (m for help): n (create new partition)
command action
e extended
p primary partition (1-4)
p
partition number (1-4): 4 (create partition sdc4)
First sector (1461915-7897087, default 1461915):
using default value 1461915
Last sector, +sectors or +size{K,M,G} (1461915-7897087, default 7897087):
using default value 7897087
command (m for help): p (display partition table)
Disk /dev/sdd: 4043 MB, 4043309056 bytes
125 heads, 62 sectors/track, 1018 cylinders, total 7897088 sectors
Units = sectors of 1 * 512 = 512 bytes
Sector size (logical/physical): 512 bytes / 512 bytes
I/O size (minimum/optimal): 512 bytes / 512 bytes
Disk identifier: 0x596bbd85
/dev/sdc1 * 63 1461914 730926 b W95 FAT32
/dev/sdc4 1461915 7897087 3217586+ 83 Linux
command (m for help): t (change partition type)
partition number (1-4): 4
hex code (type l to list codes): b
changed system type of partition 4 to b (W95 FAT32)
command (m for help): p (display partition table)
Disk /dev/sdd: 4043 MB, 4043309056 bytes
125 heads, 62 sectors/track, 1018 cylinders, total 7897088 sectors
Units = sectors of 1 * 512 = 512 bytes
Sector size (logical/physical): 512 bytes / 512 bytes
I/O size (minimum/optimal): 512 bytes / 512 bytes
Disk identifier: 0x596bbd85
device boot start end blocks id system
/dev/sdc1 * 63 1461914 730926 b W95 FAT32
/dev/sdc4 1461915 7897087 3217586+ b W95 FAT32
command (m for help): w (write partition table to disk and exit)
The partition table has been altered!
Calling ioctl() to re-read partition table.
WARNING: Re-reading the partition table failed with error 16: Device or resource busy.
The kernel still uses the old table. The new table will be used at
the next reboot or after you run partprobe(8) or kpartx(8)
Syncing disks.
At this point you should disconnect and reconnect your usb device. When it's recognised, you can format the partition you've just created
mkdosfs -F 32 /dev/sdc4
The partition is now ready for use!!!
Boot parameters [^]
Booting a linux system means loading a kernel, which is actually the operating system. Well, this is not exactly true, and it is not the only thing that happens during boot up phase, but it is not my intension to explain it here.
The kernel is loaded by Isolinux (the CD boot manager), which is able to pass a number of parameters to it, through its configuration file isolinux.cfg.
These parameters, called boot parameters, are documented by the kernel itself, and can differentiate its behavior dramatically. In our case, each CD (SystemRescueCD and Clonezilla Live) accept a different set of parameters, because they are based on gentoo and debian, respectively.
While in the splash screen of Clonezilla-SysRescCD, you can edit the boot parameters by pressing TAB. They will be presented to you, and you can add or remove what you want. You must be careful not to change or remove the parameters that are dedicated to the CD itself, as altering them will certainty make it unbootable. When you are done, just press ENTER to boot.
SystemRescueCD boot parameters [^]
|
The following info applies to SystemRescueCD v. 2.1.1. In case you need to get info for a more recent version of SystemRescueCD please see the page "Sysresccd-manual-en Booting the CD-ROM" |
A typical sysresccd isolinux entry is:
kernel rescuecd
append initrd=initram.igz video=ofonly
The kernel used is rescuecd, and anything after the word append is a boot parameter.
Available kernels (boot images):
- rescuecd Default for 32bit systems, with Framebuffer disabled, best choice.
- rescue64 Default 64 bit kernel. Use it if you want to chroot to a 64bit linux system installed on your hard disk, or if you have to run 64 bit programs. This kernel is able to boot with 32bit programs, and it requires a processor with 64bit instructions (amd64 / em64t).
- altker32 an alternative kernel for 32bit systems. Boot with this kernel if you have problems with rescuecd
- altker64 an alternative kernel for 64bit systems. Boot with this kernel in case you have problems with rescue64.
The boot parameters you can use are:
General boot options
Press <TAB> to add additional options (in SystemRescueCd-1.5 and more recent)
- docache: causes the CD-ROM to be fully loaded into memory. A slower start but once complete, programs start faster and the CD drive will be released allowing normal access to other CDs. This requires 400MB of memory to cache everything (including the
bootdisksandisolinuxdirectories). Addlowmemif you have less that 400MB of memory of to prevent these directories from being copied. - setkmap=kk: which defines the keymap to load where
kk(example:setkmap=defor German keyboards). This way you won't be prompted for the keyboard configuration during the boot. - root=/dev/xdnp: the root=<device> option boots an existing linux system. For example, if you have linux Gentoo installed on
/dev/sda6, userescuecd root=/dev/sda6to start it. Keep in mind that you must use a 64bit kernel if your system is made of 64bit programs. This option works with LVM volumes. Userescuecd root=/dev/VolGroup00/LogVol00. Support is also provided forroot=auto, which scans all the block devices for a linux system. The first linux system found will be started. Soroot=autolets you start the system installed from the CD-ROM in case you have problem with your boot loader or kernel. It's also possible to specify a partition using itsfilesystem labelorfilesystem uuid. If the label of the partition where linux is installed ismylinux, then boot it usingrescuecd root=LABEL=mylinux. Similarlyroot=UUID=b3d3bec5-997a-413e-8449-0d0ec41ccba7. See more details. - initscript=service:action: This option allows one to start/stop a service at boot time. For instance if you need the samba service to be started, you can boot with:
initscript=samba:start. This does the same thing as/etc/init.d/samba start. Use this option a multiple of times for different services. All the actions that are supported by an initscript can be used. - backstore=xxx: SystemRescueCd comes with support for the backing-stores. A backing-store saves all the changes you can make. so that you keep these changes the next time you boot. By default, sysresccd automatically scan removable devices (eg: USB sticks) at boot time and uses the first backing-store it finds. A backing-store is not mandatory and if the scan fails, it will store the files which have changed in memory. To disable the disks scan at boot time specify
backstore=offon the boot command line. If you want to save your backing-store file on a harddisk, boot withbackstore=alldevto scan all devices (not just removable devices). The default location for a backing-stores file is any file namedsysrcd.bslocated at the root of a disk which is often a USB stick. Change the path by usingbackstore=/sysrcd/mybackstore.bs. See backing-stores. - isoloop=xxx: Grub2 (currently in development: grub-1.98) provides a new feature to boot from an ISO image which is stored on the hard disk. If you put a copy of
systemrescuecd-x86-x.y.z.isoon a partition that Grub2 can read then you can boot SystemRescueCd directly from the ISO image stored on your hard drive. This is very convenient if you frequently update SystemRescueCd and you want to boot it directly from Grub2. Grub2 knows what an ISO image is and it will load the kernel image (rescuecd/rescue64) and the initramfs (initram.igz) from the ISO into memory. It will then do its normal job and execute the kernel. The SystemRescueCd init script must then be aware that itssysrcd.datfile is in an ISO and not directly on the partition. For that reason, thisisoloop=xxxboot option is required so you must use it in yourgrub.cfg. This option is only supported in SystemRescueCd-1.4.0 and more recent. This option specifies the path of the ISO image in the partition that grub considers as its root partition. It's important to understand that the path of the ISO image may be different from the path on your linux system. If you have a separate boot partition mounted on/bootand if you copy this ISO image to/boot/sysrcd/systemrescuecd-x86-x.y.z.isothen the option has to beisoloop=/sysrcd/systemrescuecd-x86-x.y.z.iso. This is because the boot partition is what Grub2 will consider as its root partition during the boot process. Please read the section about isoloop for more details.
Hardware, drivers and troubleshooting options
- dodebug: Enables verbose messages in linuxrc
- doload=xxx: loads needed kernel modules, multiple comma separated occurrences are permitted (example:
doload=3c59x,e1000) - noload=xxx: prevents loading kernel modules, multiple comma separated occurrences are permitted (example:
noload=3c59x,e1000). Use this option if you have a problem when the system loads a particular module. - nonet: this will disable the network auto detection at startup
- scandelay=x: pauses x seconds during the startup to allow slow devices to initialize. This is required when you boot a USB device. A delay of only few seconds should be enough.
- doxdetect: Since version 0.3.5 the auto-configuration is done in X.Org itself, mkxf86config is disabled by default. This option forces the system to run the mkxf86config startup script and to run the hardware auto-detection from this script. Use this option if you have problems with the graphical environment configuration. This option replaces the option
noxdetectthat was useful in previous versions. - nodetect: prevents generic hardware auto-detection. Use this option if you have problems with the hardware auto-detection.
- nomodeset: Do not load the Kernel-Mode-Setting video driver. You can use that option if you are experiencing problems with your screen during the boot process (just after modules are being loaded).
- dostartx: load the X.Org graphical environment.
- forcevesa: Forces X.Org to use the safe VESA driver instead of the best video driver detected for your video card. Use this option if you cannot get the graphical environment working with the default options.
- forcevesa=xxx: The
startxcommand will load theXvesaserver instead ofXorg, and use the screen resolution given as parameter (eg:1024x768,1280x1024x32).
- all-generic-ide: In case of problems related to your hard disk, try to enable this option (eg
rescuecd all-generic-ide) - nodmraid: Disable dmraid, for some motherboards with built-in RAID controller.
- nomdadm: Disable mdadm, for software RAID.
- acpi-off / noapic / irqpool: use these options if you have problem when the kernel boots: if it hangs on a driver or if it crashes, ...
- lowmem: For systems with smaller memory, some daemons are not started including sshd and nfsd.
- skipmount=/dev/xxx: The system mounts all the storage devices at boot time to find the sysrcd.dat file. If your hard disk is broken it should not be mounted. Boot with
skipmount=/dev/sda1 skipmount=/dev/sda2to ignore these two partitions.
Network configuration and remote access
- nonm: to disable the Network-Manager service that conflicts with the standard network command line tools such as
ifconfigandip. You can use this option if you want to configure the network using these commands. This option is not necessary when SystemRescueCd is booting from the network since the service is automatically stopped in that case. This option requires SystemRescueCd-1.5.5 or more recent. - dodhcp: to request a DHCP server provide network attributes including an IP address, gateway... If there are multiple interfaces on the computer it will run the dhcp client on all of them by default, when no argument is specified with this option. Thanks to emiliano SystemRescueCd-1.7.0-beta009 and more recent allows you to optionally specify which interfaces should be configured with dhcp. This way you can combine static and dynamic addresses in the automatic Ethernet configuration. For example you can now use options like that:
dodhcp=eth0,eth2 eth1=192.168.128.1/24
to use dhcp for eth0 and eth2 and a static address on eth1. - nodhcp: never run the dhcp client in the initramfs boot script. May be useful if you use PXE boot on a computer with several ethernet interfaces. Support for this option is available in SystemRescueCd-1.5.5 and more recent
- ethx=ipaddr/cidr: Sets the static IP address of all the ethernet interfaces on the system. The
/cidrextension is optional. For instance, if you use optionethx=192.168.0.1on a machine with two ethernet adapters, botheth0andeth1will be configured with192.168.0.1. You can use the formatethx=10.0.0.1/24(using the cidr notation) if you don't use the default netmask. - eth0=ipaddr/cidr: This option is similar to
ethx=ipaddr/cidrbut it configures only one interface at a time. To configure the network on a server that has two interfaces, use, for example:eth0=192.168.10.1/24 eth1=192.168.20.1. - dns=ipaddr: Sets the static IP address of the DNS nameserver you want to use to resolve the names. For instance
dns=192.168.0.254means that you want to use192.168.0.254as the DNS server. - gateway=ipaddr: Sets the static IP address of the default route on your network. For instance
gateway=192.168.0.254means that the computer can connect to a computer outside of the local network via192.168.0.254. - dhcphostname=myhost: Sets the hostname that the DHCP client will send to the DHCP server. This may be required if the default hostname cannot be used with your DHCP configuration. This option has been introduced in SystemRescueCd-1.3.5.
- rootpass=123456: Sets the root password of the system running on the livecd to
123456. That way you can connect from the network and ssh on the livecd and give123456password as the root password. - vncserver=x:123456: The vncserver boot option has been introduced in SystemRescueCd-1.0.2. This options forces the system to configure the VNC-server and to start it automatically at boot time. You have to replace
xwith the number of displays you want, and123456with your password. The password must be between 6 and 8 characters, else the boot option will be ignored. In other words thevncserver=2:MyPaSsWdoption will give you access to two displays (display=1 on tcp/5901 and display=2 on tcp/5902). Display 0 is reserved for X.Org since SystemRescueCd-1.1.0. SystemRescueCd-1.5.7 and more recent accept a password longer than 8 chars (between 5 and 12 chars) - nameif=xxx: You can specify what interface name to give to a particular interface using the mac address. You need SystemRescueCd-1.1.0 or newer to do that. Here is how you can specify which interface is using which mac address on a machine with two network interfaces:
nameif=eth0!00:0C:29:57:D0:6E,eth1!00:0C:29:57:D0:64. Be careful, you have to respect the separator (comma between the interfaces and exclamation marks between the name and the mac address). You can also use the magic keyword BOOTIF with SystemRescueCd-1.5.4 and more recent when you boot from pxelinux. The pxeboot loader will set BOOTIF to the name of the interface used to boot. You can then use something likenameif=eth0!BOOTIFif you want the boot interface to be calledeth0on a computer with several Ethernet interfaces.
Network boot using PXE
SystemRescueCd provides several options for booting from the network using PXE.
These options can be combined with other network boot options such as ethx (cf previous section). See PXE network booting to get a global overview of SystemRescueCd and PXE and Manage remote servers using PXE.
The second stage downloads the kernel + initramfs using DHCP/TFTP.
The third stage of the PXE boot process acquires the root files system.
Several protocols are available.
- netboot=tftp://ip/path/sysrcd.dat: from a TFTP server. The filesystem is loaded into memory. As a consequence computers with less than 400MB of memory won't be able to boot this way. The system will continue to work if the network is disconnected after the boot process.
- netboot=http://ip:port/path/sysrcd.dat: from a Web server. The file system is loaded into memory. Computers with smaller memory won't be able to boot this way. The the system continues to work if the network is disconnected after the boot process.
- netboot=nfs://ip:/path: mount an NFSv3 directory. The NFS url must be the path of the directory that contains
sysrcd.dat. Only NFSv3 can be used, NFSv4 is not supported. NFS allows computers with smaller memory to boot SystemRescueCd from the network. After the boot process, continued network connection is required or you will loose access to the root file system. - netboot=nbd://ip:port: connect to an NBD server configured with
sysrcd.daton ip:port. NBD is easier to configure than NFS (only one TCP port involved) and it allows computers with smaller memory to boot SystemRescueCd from the network. After the boot process, the network connection continues to be required to access the root file system.
For information on activating speakup, see the speakup info page.
Options provided for autorun
- ar_source=xxx: place where the autorun are stored. It may be the root directory of a partition (
/dev/sda1), an nfs share (nfs://192.168.1.1:/path/to/scripts), a samba share (smb://192.168.1.1/path/to/scripts), or an http directory (http://192.168.1.1/path/to/scripts). - autoruns=[0-9]: comma separated list of the autorun scrip to be run. For example
autoruns=0,2,7the autorun scautorun0,autorun2,autorun7are run. Useautoruns=noto disable all the autorun scripts with a number. - ar_ignorefail: continue to execute the scripts chain even if a script failed (returned a non-zero status)
- ar_nodel: do not delete the temporary copy of the autorun scripts located in
/var/autorun/tmpafter execution - ar_disable: completely disable autorun, the simple
autorunscript will not be executed - ar_nowait: do not wait for a keypress after the autorun script have been executed.
Clonezilla Live boot parameters [^]
|
The following info applies to Clonezilla Live v. 1.2.8-46 In case you need to get info for a more recent version of Clonezilla Live please see the page "The boot parameters for Clonezilla live" |
A typical Clonezilla Live isolinux entry is:
kernel /live/vmlinuz1
append initrd=/live/initrd1.img boot=live union=aufs ocs_live_run="ocs-live-general"
ocs_live_extra_param="" ocs_live_keymap="" ocs_live_batch="no" ocs_lang="" vga=791 nolocales
The kernel used is vmlinuz, and anything after the word append is a boot parameter.
The following info comes from the page titled The boot parameters for Clonezilla live.
- Boot parameters from live-initramfs. You can refer to this manual of live-initramfs.
- Boot parameters specially for Clonezilla. All of them are named as "ocs_*", e.g. ocs_live_run, ocs_live_extra_param, ocs_live_batch, ocs_lang.
- ocs_live_run is the main program to run in Clonezilla live to save or restore. or other command. Available program: ocs-live-general, ocs-live-restore or any command you write. Use the Absolute path in Clonezilla live.
e.g. ocs_live_run="ocs-live-general"
//NOTE// You might have to use "sudo" command inside your own script, or you can assign it like: ocs_live_run="sudo bash /my-clonezilla"
- ocs_live_extra_param will be used only when ocs_live_run=ocs-live-restore (not for ocs-live-general or any other), then it will be passed to ocs-sr. Therefore these parameters are actually those of ocs-sr.
e.g. ocs_live_extra_param="--batch -c restoredisk sarge-r5 hda" - ocs_live_keymap is for keymap used in Clonezilla live. Man install-keymap for more details.
e.g. ocs_live_keymap="NONE" (won't change the default layout)
ocs_live_keymap="/usr/share/keymaps/i386/azerty/fr-latin9.kmap.gz" (French keyboard) - batch mode or not (yes/no), if no, will run interactively.
e.g. ocs_live_batch="no" - ocs_lang is the language used in Clonezilla live. Available value: en_US.UTF-8, zh_TW.UTF-8... (see $DRBL_SCRIPT_PATH/lang/bash/) e.g. ocs_lang="en_US.UTF-8"
- ocs_debug (or ocs-debug) is for you to enter command line prompt before any clonezilla-related action is run. This is easier for you to debug.
- ocs_daemonon, ocs_daemonoff, ocs_numlk, ocs_capslk.
Ex. for the first 2 parameters, ocs_daemonon="ssh", then ssh service will be turned on when booting. For the last 2 parameters, use "on" or "off", e.g. ocs_numlk=on to turn on numberlock when booting. - ocs_prerun, ocs_prerun1, ocs_prerun2... is for you to run a command before Clonezilla is started. E.g. ocs_prerun="/live/image/myscript.sh". If you have more commands to run, you can assign them in the order: ocs_prerun=..., ocs_prerun1=..., ocs_prerun2=.... If more than 10 parameters, remember to use ocs_prerun01, ocs_prerun02..., ocs_prerun11 to make it in order.
- ocs_live_run_tty. This option allows you to specify the tty where $ocs_live_run is run. By default $ocs_live_run is run on /dev/tty1 only. If you want to use ttyS0, for example, add live-getty and console=ttyS0,38400n81 in the boot parameter.
//NOTE//
- If "live-getty console=ttyS0,38400n81" are assigned in the boot parameters, ocs_live_run_tty will honor ttyS0, even other value is assigned to ocs_live_run_tty in boot parameter.
- It's recommended to assign ocs_lang and ocs_live_keymap in the boot parameters too.
- ip, this option allows you to specify the network parameters for network card. In Clonezilla live a patched live-initramfs is used, which is different from the original live-initramfs so that you can assign DNS server, too. Its format is: ip=ethernet port,IP address, netmask, gateway, DNS. E.g. If you want to assing eth0 with IP address 10.0.100.1, netmask 255.255.255.0, gateway 10.0.100.254, DNS server 8.8.8.8, you can assign the following in the boot parameter:
ip=eth0:10.0.100.1:255.255.255.0:10.0.100.254:8.8.8.8
If more than one network card, you can use "," to separate them, e.g.:
ip=eth0:10.0.100.1:255.255.255.0:10.0.100.254:8.8.8.8,eth1:192.168.120.1:255.255.255.0:192.168.120.254::
- Besides, "live-netdev" (yes, not ocs_live_netdev) can be used when using PXE booting, you can force to assign the network device to get filesystem.squashfs. This is useful when there are two or more NICs are linked. E.g. live-netdev="eth1" allows you to force the live-initramfs to use eth1 to fetch the root file system filesystem.squashfs.
- ocs_live_run is the main program to run in Clonezilla live to save or restore. or other command. Available program: ocs-live-general, ocs-live-restore or any command you write. Use the Absolute path in Clonezilla live.
With the above options, we have the following examples:
- A PXE config example for you to boot Clonezilla live via PXE, and ssh service is on, the password of account "user" is assigned:
----------------------------------------
label Clonezilla Live
MENU LABEL Clonezilla Live
MENU DEFAULT
kernel vmlinuz1
append initrd=initrd1.img boot=live union=aufs noswap noprompt vga=788 fetch=tftp://192.168.120.254/filesystem.squashfs usercrypted=bkuQxLqLRuDW6 ocs_numlk="on" ocs_daemonon="ssh"
----------------------------------------
The usercrypted password is created by:
echo YOUR_PASSWORD | mkpasswd -s
("mkpasswd" is from package "whois" in Debian or Ubuntu. Check your GNU/Linux to see which package provides this command if you are not using Debian or Ubuntu. Replace YOUR_PASSWORD with your plain text password, and remember do not put any " in the boot parameters of live-initramfs (while it's ok for those ocs_* boot parameters), i.e. do NOT use something like usercrypted="bkuQxLqLRuDW6").
//NOTE// If you do not assign salt to mkpasswd, the encrypted password will not be the same every time you create it.
For more about usercrypted discussion, please check the here.
- How to put your own binary driver in Clonezilla live without modifying /live/filesystem.squashfs:
- Boot clonezilla live
- Become root by running "sudo su -"
- Copy the dir lsi, which contains a precompiled kernel module matching the running kernel in Clonezilla live and a script to run it, to a working dir, e.g.:
cp -r /live/image/lsi /home/partimag - cd /home/partimag
- /opt/drbl/sbin/ocs-live-dev -c -s -i lsi -u lsi -x "ocs_prerun=/live/image/lsi/prep-lsi.sh"
- /opt/drbl/sbin/ocs-iso -s -i lsi -u lsi -x "ocs_prerun=/live/image/lsi/prep-lsi.sh"
- ///NOTE/// In this example, the 2 files in dir lsi are: megasr.ko (the binary driver) and prep-lsi.sh. The contents of prep-lsi.sh:
------------------------
#!/bin/bash
cp -f /live/image/lsi/megasr.ko /lib/modules/`uname -r`/kernel/drivers/block/
chown root.root /lib/modules/`uname -r`/kernel/drivers/block/megasr.ko
depmod -a modprobe megasr
sleep 1
------------------------
- To put your customized script with a PXE version of Clonezilla live (You have to use Clonezilla live version 1.2.2-2 or later):
In this example, we assume (1) The IP address of your PXE server is 192.168.120.254, (2) the customized script (custom-ocs-2) is put on your PXE server's tftpd root dir (E.g. On DRBL server, the path is /tftpboot/nbi_img/. It might be different in your case if you are not use DRBL server as a PXE server).
Therefor your pxelinux.cfg/default file is like:------------------------
label Clonezilla Live
MENU DEFAULT
# MENU HIDE
MENU LABEL Clonezilla Live
# MENU PASSWD
kernel vmlinuz1
append initrd=initrd1.img boot=live union=aufs noswap noprompt vga=788 ip=frommedia fetch=tftp://192.168.120.254/filesystem.squashfs ocs_prerun="busybox tftp -g -b 10240 -r custom-ocs-2 -l /tmp/custom-ocs-2 192.168.120.254" ocs_live_run="bash /tmp/custom-ocs-2" ocs_live_keymap="NONE" ocs_live_batch="no" ocs_lang="en_US.UTF-8" nolocales
TEXT HELP
Boot Clonezilla live via network
ENDTEXT
------------------------
The content of custom-ocs-2 can be like:------------------------ #!/bin/bash . /opt/drbl/sbin/drbl-conf-functions . /opt/drbl/sbin/ocs-functions . /etc/ocs/ocs-live.conf # Load language file ask_and_load_lang_set en_US.UTF-8 # 1. Mount the clonezilla image home. # Types: local_dev, ssh_server, samba_server, nfs_server prep-ocsroot -t nfs_server # 2. Restore the image if mountpoint /home/partimag/ &>/dev/null; then ocs-sr -l en_US.UTF-8 -c -p choose restoredisk ask_user ask_user else [ "$BOOTUP" = "color" ] && $SETCOLOR_FAILURE echo "Fail to find the Clonezilla image home /home/partimag!" echo "Program terminated!" [ "$BOOTUP" = "color" ] && $SETCOLOR_NORMAL fi ------------------------
live-initramfs manual [^]
This is the manual of live-initramfs
live-initramfs(7)
=================
:man source: 1.157.3
:man manual: Debian Live
Name
----
live-initramfs - Debian Live initramfs hook
Synopsis
--------
BOOT=live
as kernel parameter at boot prompt.
Description
-----------
live-initramfs is a hook for the initramfs-tools, used to generate a initramfs
capable to boot live systems, such as those created by *live-helper*(7).
This includes the Debian Live isos, netboot tarballs, and usb stick images.
At boot time it will look for a (read-only) media containing a "/live"
directory where a root filesystems (often a compressed filesystem image like
squashfs) is stored. If found, it will create a writable environment, using
aufs, for Debian like systems to boot from.
You probably do not want to install this package onto a non-live system,
although it will do no harm.
live-initramfs is a fork of casper.
casper was originally written by Tollef Fog Heen <tfheen@canonical.com>
and Matt Zimmerman <mdz@canonical.com>.
Boot options
------------
Here is the complete list of recognized boot parameters by live-initramfs.
  access=*ACCESS*::
Set the accessibility level for physically or visually impared users. ACCESS
must be one of v1, v2, v3, m1, or m2. v1=lesser visual impairment, v2=moderate
visual impairment, v3=blindness, m1=minor motor difficulties, m2=moderate motor
difficulties.
  console=*TTY,SPEED*::
Set the default console to be used with the "live-getty" option. Example:
"console=ttyS0,115200"
  debug::
Makes initramfs boot process more verbose.
  fetch=*URL*::
Another form of netboot by downloading a squashfs image from a given url,
copying to ram and booting it. Due to current limitations in busyboxs wget
and DNS resolution, an URL can not contain a hostname but an IP only.
Not working: http://example.com/path/to/your_filesystem.squashfs
Working: http://1.2.3.4/path/to/your_filesystem.squashfs
Also note that therefore it's currently not possible to fetch an image from a
namebased virtualhost of an httpd if it is sharing the ip with the main httpd
instance.
  hostname=*HOSTNAME*, username=*USER*, userfullname=*USERFULLNAME*::
Those parameters lets you override values read from the config file.
  ignore_uuid
Do not check that any UUID embedded in the initramfs matches the discovered
medium. live-initramfs may be told to generate a UUID by setting
LIVE_GENERATE_UUID=1 when building the initramfs.
  integrity-check::
If specified, an MD5 sum is calculated on the live media during boot and
compared to the value found in md5sum.txt found in the root directory of the
live media.
  ip=**[CLIENT_IP]:[SERVER_IP]:[GATEWAY_IP]:[NETMASK]:[HOSTNAME]:
     [DEVICE]:[AUTOCONF] [,[CLIENT_IP]:[SERVER_IP]:[GATEWAY_IP]:[NETMASK]:[HOSTNAME]:
     [DEVICE]:[AUTOCONF]]***::
Let you specify the name(s) and the options of the interface(s) that should be
configured at boot time. Do not specify this if you want to use dhcp (default).
It will be changed in a future release to mimick official kernel boot param
specification (e.g. ip=10.0.0.1::10.0.0.254:255.255.255.0::eth0,:::::eth1:dhcp).
  ip=[**frommedia**]::
If this variable is set, dhcp and static configuration are just skipped and the
system will use the (must be) media-preconfigured /etc/network/interfaces
instead.
  {keyb|kbd-chooser/method}=**KEYBOARD**, {klayout|console-setup/layoutcode}=**LAYOUT**,
    {kvariant|console-setup/variantcode}=**VARIANT**, {kmodel|console-setup/modelcode}=
    **CODE**, koptions=**OPTIONS**::
Configure the running keyboard as specified, if this one misses live-initramfs
behaves as if "keyb=us" was specified. It will be interfered from "locale=" if
locale is only 2 lowecase letters as a special case. You could also specify
console layout, variant, code, and options (no defaults).
  live-getty::
This changes the auto-login on virtual terminals to use the (experimental)
live-getty code. With this option set the standard kernel argument "console=" is
parsed and if a serial console is specified then live-getty is used to autologin
on the serial console.
  {live-media|bootfrom}=**DEVICE**::
If you specify one of this two equivalent forms, live-initramfs will first try
to find this device for the "/live" directory where the read-only root
filesystem should reside. If it did not find something usable, the normal scan
for block devices is performed.
Instead of specifing an actual device name, the keyword 'removable' can be used
to limit the search of acceptable live media to removable type only. Note that
if you want to further restrict the media to usb mass storage only, you can use
the 'removable-usb' keyword.
  {live-media-encryption|encryption}=**TYPE**::
live-initramfs will mount the encrypted rootfs TYPE, asking the passphrase,
useful to build paranoid live systems :-). TYPE supported so far are "aes" for
loop-aes encryption type.
  live-media-offset=**BYTES**::
This way you could tell live-initramfs that your image starts at offset BYTES in
the above specified or autodiscovered device, this could be useful to hide the
Debian Live iso or image inside another iso or image, to create "clean" images.
  live-media-path=**PATH**::
Sets the path to the live filesystem on the medium. By default, it is set to
'/live' and you should not change that unless you have customized your media
accordingly.
  live-media-timeout=**SECONDS**::
Set the timeout in seconds for the device specified by "live-media=" to become
ready before giving up.
  {locale|debian-installer/locale}=**LOCALE**::
Configure the running locale as specified, if not present the live-media rootfs
configured locale will be used and if also this one misses live-initramfs behave
as "locale=en_US.UTF-8" was specified. If only 2 lowercase letter are specified
(like "it"), the "maybe wanted" locale is generated (like en:EN.UTF-8), in this
case if also "keyb=" is unspecified is set with those 2 lowercase letters
(keyb=us). Beside that facility, only UTF8 locales are supported by
live-initramfs.
  module=**NAME**::
Instead of using the default optional file "filesystem.module" (see below)
another file could be specified without the extension ".module"; it should be
placed on "/live" directory of the live medium.
  netboot[=**nfs**|**cifs**]::
This tells live-initramfs to perform a network mount. The parameter "nfsroot="
(with optional "nfsopts="), should specify where is the location of the root
filesystem.  With no args, will try cifs first, and if it fails nfs.
  nfsopts=::
This lets you specify custom nfs options.
  noautologin::
This parameter disables the automatic terminal login only, not touching gdk/kdm.
  noxautologin::
This parameter disables the automatic login of gdm/kdm only, not touching
terminals.
  nofastboot::
This parameter disables the default disabling of filesystem checks in
/etc/fstab. If you have static filesystems on your harddisk and you want them to
be checked at boot time, use this parameter, otherwise they are skipped.
  nopersistent::
disables the "persistent" feature, useful if the bootloader (like syslinux) has
been installed with persistent enabled.
  noprompt
Do not prompt to eject the CD or remove the USB flash drive on reboot.
  nosudo::
This parameter disables the automatic configuration of sudo.
  swapon::
This parameter enables usage of local swap partitions.
  nouser::
This parameter disables the creation of the default user completely.
  noxautoconfig::
This parameter disables Xorg auto-reconfiguration at boot time. This is valuable
if you either do the detection on your own, or, if you want to ship a custom,
premade xorg.conf in your live system.
  persistent[=nofiles]::
live-initramfs will look for persistent and snapshot partitions or files labeled
"live-rw", "home-rw", and files called "live-sn*", "home-sn*" and will try to,
in order: mount as /cow the first, mount the second in /home, and just copy the
contents of the latter in appropriate locations (snapshots). Snapshots will be
tried to be updated on reboot/shutdown. Look at live-snapshot(1) for more
informations. If "nofiles" is specified, only filesystems with matching labels
will be searched; no filesystems will be traversed looking for archives or image
files. This results in shorter boot times.
  persistent-path=PATH
live-initramfs will look for persistency files in the root directory of a partition,
with this parameter, the path can be configured so that you can have multiple
directories on the same partition to store persistency files.
  {preseed/file|file}=**FILE**::
A path to a file present on the rootfs could be used to preseed debconf
database.
  package/question=**VALUE**::
All debian installed packages could be preseeded from command-line that way,
beware of blanks spaces, they will interfere with parsing, use a preseed file in
this case.
  quickreboot::
This option causes live-initramfs to reboot without attempting to eject the
media and without asking the user to remove the boot media.
  showmounts::
This parameter will make live-initramfs to show on "/" the ro filesystems
(mostly compressed) on "/live". This is not enabled by default because could
lead to problems by applications like "mono" which store binary paths on
installation.
  silent
If you boot with the normal quiet parameter, live-initramfs hides most messages
of its own. When adding silent, it hides all.
  textonly
Start up to text-mode shell prompts, disabling the graphical user interface.
  timezone=**TIMEZONE**::
By default, timezone is set to UTC. Using the timezone parameter, you can set it
to your local zone, e.g. Europe/Zurich.
  todisk=**DEVICE**::
Adding this parameter, live-initramfs will try to copy the entire read-only
media to the specified device before mounting the root filesystem. It probably
needs a lot of free space. Subsequent boots should then skip this step and just
specify the "live-media=DEVICE" boot parameter with the same DEVICE used this
time.
  toram::
Adding this parameter, live-initramfs will try to copy the whole read-only media
to the computer's RAM before mounting the root filesystem. This could need a lot
of ram, according to the space used by the read-only media.
  union=**aufs**|**unionfs**::
By default, live-initramfs uses aufs. With this parameter, you can switch to
unionfs.
  utc=**yes**|**no**::
By default, Debian systems do assume that the hardware clock is set to UTC. You
can change or explicitly set it with this parameter.
  xdebconf::
Uses xdebconfigurator, if present on the rootfs, to configure X instead of the
standard procedure (experimental).
  xvideomode=**RESOLUTION**::
Doesn't do xorg autodetection, but enforces a given resolution.
Files
-----
  /etc/live.conf
Some variables can be configured via this config file (inside the live system).
   /live/filesystem.module
This optional file (inside the live media) contains a list of white-space or
carriage-return-separated file names corresponding to disk images in the "/live"
directory. If this file exists, only images listed here will be merged into the
root aufs, and they will be loaded in the order listed here. The first entry
in this file will be the "lowest" point in the aufs, and the last file in
this list will be on the "top" of the aufs, directly below /cow.  Without
this file, any images in the "/live" directory are loaded in alphanumeric order.
 /etc/live-persistence.binds
This optional file (which resides in the rootfs system, not in the live media)
is used as a list of directories which not need be persistent: ie. their
content does not need to survive reboots when using the persistence features.
This saves expensive writes and speeds up operations on volatile data such as
web caches and temporary files (like e.g. /tmp and .mozilla) which are
regenerated each time. This is achieved by bind mounting each listed directory
with a tmpfs on the original path.
See also
--------
live-snapshot(1), initramfs-tools(8), live-helper(7), live-initscripts(7),
live-webhelper(7)
Bugs
----
Report bugs against live-initramfs
http://packages.qa.debian.org/live-initramfs.
Homepage
--------
More information about the Debian Live project can be found at
http://debian-live.alioth.debian.org/ and
http://wiki.debian.org/DebianLive/.
Authors
-------
live-initramfs is maintained by Daniel Baumann <daniel@debian.org>
for the Debian project.
live-initramfs is a fork of casper.
casper was originally written by Tollef Fog Heen <tfheen@canonical.com>
and Matt Zimmerman <mdz@canonical.com>.
About Clonezilla Live [^]
The DRBL-based PXEBoot Clonezilla is used to clone many computers simultaneously. It is an extremely useful tool, however, it does have several limitations. In order to use it, you must first prepare a DRBL server AND the machine to be cloned must boot from a network (e.g. PXE/Etherboot).
To address these limitations, the Free Software Lab at the NCHC has combined Debian Live with Clonezilla to produce "Clonezilla Live", a new software that can be used to easily clone individual machines.
Clonezilla Live provides two modes of operation:
- device-image
In this mode of operation, a disk/partition can be saved to an image file. This image file can be used to restore the original disk/partition. With Clonezilla-SysRescCD, it can also be used to create an automated restore CD/DVD. This is the mode of operation we will discuss here. - device-device (cloning)
This mode of operation creates an exact copy of the original disk/partition on the fly.
When working in device-image mode, you will always have to specify three things:
- The location of the image file
- The working parameters for the operation
- The disk/partition that will be saved/restored
Clonezilla Live provides a user friendly interface in order to insert this data.
When Clonezilla Live is booted up, either normally or copied to RAM, the contents of the whole CD/DVD can be found in folder /live/image. This is where you will find any extra files, such as the restorecd and the doc folders.
Starting and stopping Clonezilla Live [^]
When you boot into Clonezilla Live, the program (actually a script) starts automatically. There are many places where you can stop it, by selecting Cancel or answering N(o) to a question. When you do that you will probably get the following:
Now you can choose to:
(0) Poweroff
(1) Reboot
(2) Enter command line prompt
(3) Start over
[2]
Select Poweroff or Reboot, only if you haven't already mounted a disk partition. I found out by experience, it is not always safe to let any live CD automatically unmount my partitions. So if you have already specified the image partition and/or the partition to save/restore, you should enter command line prompt and type:
sudo su -
mount | grep /dev/[sh]d
and then unmount the partitions shown by the last command. So if the results of this command is for example:
/dev/hda1 on /home/partimag type vfat (rw)
just type the command:
umount /dev/hda1
and it's now safe to Poweroff of Reboot.
If, on the other hand, you just want to restart the program, type:
ocs-live
About the Image file [^]
One thing should be made clear about the image file: it is not a file, it is a folder, containing the actual image file and some data about the disk/partition it is associated with. So when you insert the image file name, you actually insert the folder name where the image will be saved/restored.
Before you are able to insert the image file name, a list of partitions will be presented to you, so that you can choose where it should be saved/found. When you select one of them, it will be mounted and a list of folders will be presented to you, so you can select the base image directory (first level directory within the partition), which will then be mounted under /home/partimag. This way you can, for example, create a folder called all_my_images in one of your disk partitions, and move all your image files in there; Clonezilla Live will be able to find them!!!
Another thing that should be pointed out is that only unmounted partitions will be included in the above list. This means that if you have stopped the program at some point after specifying the partition where the image file resides, and it has been mounted, it will not be present in the list the next time it is presented to you, and you will not be able to use it.
There are two things you can do in this case; either unmount the partition, as stated above, or select
skip Use existing /home/partimag
instead of any other option, when you restart the program. The later of course means that you still want to use the previously specified partition as the image file location.
Fianlly I should say that Clonezilla Live is able to use a remote disk/partition as the location of the image file, mounted through ssh, samba or nfs. Using any of these options is a more advanced topic, way beyond the scope of this presentation.
Scripts' options [^]
This section presents the options which are available at the "Clonezilla advanced extra parameters" screens, if the "Expert" mode is selected. For other options, see Getting backups and Restoring data.
Backup options [^]
Imaging program priority [^]
-q2 Priority: partclone > partimage > dd
-q1 Priority: Only dd (supports all filesystem, but inefficient)
-q Priority: ntfsclone > partimage > dd
Priority: partimage > dd (no ntfsclone)
This option chooses which imaging programs are preferred. By default, Clonezilla Live uses partclone for nearly all filesystems, including ext2/3/4, NTFS and FAT32. If a filesystem isn't supported by partclone, but is supported by partimage (spesifically: if the filesystem is HFS, HPFS or JFS), it is cloned by partimage. If it isn't supported by either (for example Linux swap, though it doesn't make any sense to clone swap partitions), it is cloned by dd. Unlike partclone or partimage, dd copies all blocks of the partition instead of only used, resulting in slower imaging process and bigger images.
Normally the default option -q2 should be preferred. Try another option if you have problems and believe they are caused by the imaging program used.
Various parameters [^]
These options are available at the second "Clonezilla advanced extra parameters" screen.
-c Client waits for confirmation before cloning
This option causes Clonezilla Live to ask if you really want to clone the disk/partition just before it starts cloning. It is enabled by default.
-j2 Clone the hidden data between MBR and 1st partition
If this option is set, the 15 hidden sectors between Master Boot Record and the first partition are copied. This area usually contains some data necessary for booting. The option is enabled by default and should be kept enabled if you are cloning a bootable disk.
-nogui Use text output only, no TUI/GUI output
Causes Clonezilla Live to force the used programs to use only command-line interface even if text-based or graphical user interface is available.
-a Do NOT force to turn on HD DMA
Prevents Clonezilla Live from using DMA for communicating with hard drives. Slows cloning down but in some conditions cloning without this option can be impossible.
-rm-win-swap-hib Remove page and hibernation files in Win if exists
This option prevents Clonezilla Live from cloning your page file if you are cloning a partition containing Windows. Often the page file is big and unneeded, and skipping it may speed cloning up without causing any harm. Mind you, this option is disabled by default because sometimes the page file may be necessary.
-ntfs-ok Skip checking NTFS integrity, even bad sectors (ntfsclone only)
This option works only if you selected the -q option and you're cloning a NTFS partition. It prevents the integrity check of NTFS partitions and speeds the cloning process up a little. However, if the check is disabled, there is a risk that the filesystem is damaged and the image created from it is useless.
-rescue Continue reading next one when disk blocks read errors
If this option is set, Clonezilla Live continues cloning even if a read error occurs. If there is one, the disk image will be corrupted, but failing hard drives can only be cloned with this option enabled.
-fsck-src-part Check and repair source file system before saving
This option causes Clonezilla Live to check the integrity of the partition(s) to be cloned. If the filesystem of the partition is damaged, Clonezilla Live also attempts to repair it automatically. Enabling this option reduces the risk that the image contains a damaged filesystem. However, the option is disabled by default because the automatic filesystem repair attempt may cause data loss.
-gm Generate image MD5 checksums
Causes Clonezilla Live to calculate MD5 checksum(s) of image(s) created. If the image gets corrupted afterwards, the checksum allows to notice the corruption before the image is restored. Mind you, calculating the checksum takes some time and slows the process down a little.
-gs Generate image SHA1 checksums
This option is identical to the above, but creates SHA1 checksum(s) instead of MD5. SHA1 is considered to be more accurate checksum algorithm than MD5, but MD5 is more popular.
Compression method [^]
-z1p Use parallel gzip compression (testing), for multicore/CPU
-z1 gzip compression (fast with a smaller image)
-z2p Use parallel bzip2 compression (testing), for multicore/CPU
-z2 bzip2 compression (slowest but smallest image)
-z3 lzo compression (faster with image size approx. to that of gzip)(NOTE!!)
-z4 lzma_compression_(slowest_but_also_small_image,_faster_decompression_than_bzip2)
-z5p Use_parallel_xz_compression_(testing),_for_multicore/CPU
-z5 xz_compression_(slowest_but_also_small_image,_faster_decompression_than_bzip2)
-z6p Use_parallel_lzip_compression_(testing),_for_multicore/CPU
-z6 lzip_compression_(slowest_but_also_small_image,_faster_decompression_than_bzip2)
-z0 No compression (fastest but largest image size)
This option chooses the method which is used to compress the image while creating it.
If no compression is used at all, there won't be any negative speed impact caused by compression. However, the image file size is the size of all the data backed up - for example, if you clone a 160 GB hard drive containing 60 gigabytes of data, the resulting disk image will be 60 gigabytes in size.
Gzip and lzop are fast compression methods. Lzop is many times faster than gzip, but creates slightly larger images. Clonezilla Live warns that lzop requires good-quality RAM, but I (the contributor who wrote this chapter) think other compression methods require good RAM too.
Bzip2, lzma, xz and lzip are powerful compression methods. Lzma creates a little smaller images than bzip2, and decompressing lzma-compressed images is faster than decompressing bzip2 images. But there is no free lunch: lzma compression method is very slow compared even to bzip2, which isn't fast method either.
Lzma method is becoming obsolete, and both xz and lzip are attempting to become its successor. They are a bit less powerful compression methods than lzma, but much faster. The differences between xz and lzip are virtually non-existent.
If you don't use the i486 version of Clonezilla-SysRescCD and your processor contains multiple cores and/or supports Hyper-Threading, parallel gzip, bzip2, xz and lzip compression methods are also available. Parallel compression means that each processor core compresses a different part of the image at a time. Without parallel compression one core compresses everything.
The speed impact caused by parallel compression depends on the number of processor cores available. In addition, Hyper-Threading increases the speed by about 30 % if parallel compression is used. For example, if your processor contains four cores and supports Hyper-Threading, speed with parallel compression is nearly 5,2 times as high as without. However, parallel compression is currently an experimental feature.
Splitting [^]
This option (command line: -i [number]) decides if the created image files are splitted into smaller pieces, and if yes, how large the pieces are. This setting doesn't usually matter, but some filesystems (most importantly FAT32) don't allow files larger than four gigabytes. If you're saving the disk image to a FAT32 partition, enter 4000 or less. (Value 0 disables splitting, so don't use it in that case.) If the filesystem allows files big enough, enter any value which isn't too small (you don't want to split the image into too many pieces, do you?)
Clonezilla Live warns that it is no longer safe to disable splitting because value 0 can confuse init. I (the contributor) don't know what the warning exactly means and haven't been able to reproduce the problem. Anyway, entering a very big value, for example 999999999999, is a safe way to keep the image in one piece.
Postaction [^]
-p true Do nothing when the clone finishes
-p reboot Reboot client when the clone finishes
-p poweroff Shutdown client when the clone finishes
In this screen you can decide what Clonezilla Live does when the disk/partition is cloned.
Spiros told above that he has found out that it's not always safe to allow Live CDs automatically unmount partitions, and I have lost data when trying auto-unmount with a script. So, avoid -p reboot and -p poweroff options if possible. You have been warned.
Restore options (script ocs-sr) [^]
Various parameters [^]
These options are available at the first "Clonezilla advanced extra parameters" screen.
-g auto Reinstall grub in client disk MBR (only if grub config exists)
Causes Clonezilla Live to reinstall GRUB into the Master Boot Record of the disk if at least one partition contains GRUB config file (/boot/grub/menu.lst). The option is enabled by default and shouldn't cause any harm. However, it should be disabled if you for example have another bootloader in MBR and chainload GRUB with it.
-e1 auto Automatically adjust filesystem geometry for a NTFS boot partition if exists
The NTLDR bootloader used by Windows isn't able to determine automatically where the files it needs are stored. It only knows their physical locations, which sometimes change when the disk or partition is copied. If the locations are changed and this option is selected, the location information of the files is changed accordingly. This option is enabled by default and if it's disabled, the cloned Windows will fail to boot.
-e2 sfdisk uses CHS of hard drive from EDD(for non-grub boot loader)
This option requires that the -e1 auto option is selected. It causes Clonezilla Live to use disk read interface named EDD for determining the physical locations of the files when updating the location information used by NTLDR. The option is enabled by default because it reduces the risk that Windows doesn't boot.
-hn0 PC Change MS Win hostname (based on IP address) after clone
If this option is selected and a partition containing Microsoft Windows is cloned, its IP address -based hostname is changed after cloning. Computers which are on any network simultaneously need to have different hostnames, so this option is needed if a Windows system is cloned to another computer and the original computer is still used in addition to the one where the image was restored to.
-hn1 PC Change MS Win hostname (based on MAC address) after clone
This option causes the MAC address -based hostname of Windows to change. This option needs also be enabled in the above condition.
-v Prints verbose messages (especially for udpcast)
Causes Clonezilla Live to tell more information of what it does.
-nogui Use text output only, no TUI/GUI output
Causes Clonezilla Live to force the used programs to use only command-line interface even if text-based or graphical user interface is available.
-b Run clone in batch mode (DANGEROUS!)
Causes Clonezilla Live to run in batch mode. According to Clonezilla Live reference card, this option is dangerous, though I (the contributor) don't know why.
-c Client waits for confirmation before cloning
This option causes Clonezilla Live to ask if you really want to clone the disk/partition just before it starts cloning. It is enabled by default.
-t Client does not restore the MBR (Mater Boot Record)
Do NOT restore the MBR (Mater Boot Record) when restoring image. If this option is set, you must make sure there is an existing MBR in the current restored harddisk. Default is Yes.
-t1 Client restores the prebuilt MBR from syslinux (For Windows only)
If this option is set, the MBR is overwritten by prebuilt one which chainloads Windows. Use this option if you have to restore Windows and make it bootable, but don't have the original MBR or backup of it.
-r Try to resize the filesystem to fit partition size
This option is useful if you are cloning a small disk to larger one. It tries to resize the restored filesystem to the size of the partition where it was restored to. It allows you to use the whole size of your new disk without resizing the partition afterwards. The option requires that the disk where the image is copied already contains a partition where the image is restored or that the option -k1 is enabled.
-e sfdisk uses the CHS value of hard drive from the saved image
Force to use the saved CHS (cylinders, heads, sectors) when using sfdisk. Of cource, there is no use of it when using any of -j0, -k or -k2 options.
-icrc Ignore CRC checking of partclone
This option causes partclone to skip checking the CRC32 checksums of the image. Enabling this option speeds the restore process up. However, if this option is enabled and the -cm and -cs options are disabled, there is no way to notice if the image has corrupted.
-j1 Write MBR (512 B) again after image is restored. Not OK for partition table diffe
When a disk image is restored, the partition table must be updated to reflect the actual partitions in the disk. If you don't want it to happen, enable this option. Then the Master Boot Record (including the partition table) is restored again after restoring the image. Note that using this option can destroy all the data in the target drive.
-j2 Clone the hidden data between MBR and 1st partition
If this option is set, the 15 hidden sectors between Master Boot Record and the first partition are restored. This area usually contains some data necessary for booting. The option is enabled by default and should be kept enabled if you are cloning a bootable disk.
-cm Check image by MD5 checksums
If the image folder contains MD5 checksum(s), this option causes Clonezilla Live to check if the image has corrupted by calculating its checksum and comparing it to the precalculated one. Mind you, calculating the checksum takes some time and slows the process down a little.
-cs Check image by SHA1 checksums
This option is identical to the above, but checks SHA1 checksum(s) instead of MD5.
-a Do NOT force to turn on HD DMA
Prevents Clonezilla Live from using DMA for communicating with hard drives. Slows cloning down but in some conditions cloning without this option can be impossible.
-o0 Run script in $OCS_PRERUN_DIR before clone starts
Run the scripts in the directory $OCS_PRERUN_DIR before clone is started. The location of the directory can be determined by editing the file drbl-ocs.conf. By default it is /opt/drbl/share/ocs/prerun.
-o1 Run script in $OCS_POSTRUN_DIR as clone finishes
Run the scripts in the directory $OCS_POSTRUN_DIR when clone is finished. The location of the directory can be determined by editing the file drbl-ocs.conf. By default it is /opt/drbl/share/ocs/postrun. The command will be run before that assigned in -p.
The scripts will be executed by the program "run-parts". run-parts only accepts that the name of the scripts must consist entirely of upper and lower case letters, digits and underscores. So if your file name has an illegal character ".", run-parts won't run it. You can test which files will be executed by entering the command:
run-parts --test /opt/drbl/share/ocs/postrun
Partition table [^]
This option decides what is done to the partition table of the target drive.
Use the partition table from the image
This option causes Clonezilla Live to copy the partition table from the image. Use this option if you are cloning a whole disk or somehow know that the partition tables are identical (for example, if you are restoring a partition to the same disk where it was copied from and haven't repartitioned the drive after creating the backup). This is the default option.
-k Do NOT create a partition table on the target disk
Do NOT create partition in target harddisk. If this option is set, you must make sure there is an existing partition table in the current restored harddisk.
-k1 Create partition table proportionally (OK for MRB format, not GPT)
Causes Clonezilla Live to create the partition table automatically using sfdisk after restoring the images. This option works nearly always, but sometimes cloned Windows don't boot. Note that this option doesn't work if you have GUID Partition Table on your disk. (Most likely you don't have one.)
-k2 Enter command line prompt to create partition manually later
Like the -k option, this option doesn't create the partition table automatically. However, after restoring the image you are led to command line prompt where you can create the partition table manually. Don't use this option if you don't know how the partition table can be created.
-j0 Use dd to create partition (NOT OK if logical drives exist)
Use dd to dump the partition table from saved image instead of sfdisk.
We read in DRBL FAQ/Q&A:
When I use clonezilla to clone MS windows, there is no any problem when saving an image from template machine. However, after the image is restored to another machine, it fails to boot, the error message is "Missing Operating System" or just a blinking underscore. What's going on ?
Usually this is because GNU/Linux and M$ windows interpret the CHS (cylinder, head, sector) value of harddrive differently. Some possible solutions:
1. Maybe you can change the IDE harddrive setting in BIOS, try to use LBA instead of auto mode.
2. Try to choose both
[*] -j0 Use dd to create partition table instead of sfdisk
and
[*] -t1 Client restores the prebuilt MBR from syslinux (For Windows only)
when you restore the image.
3. Try to choose
[*] -t1 Client restores the prebuilt MBR from syslinux (For Windows only)
and *uncheck*
[ ] -g auto Reinstall grub in client disk MBR (only if grub config exists)
[ ] -r Try to resize the filesystem to fit partition size
when you restore the image. You can refer to this discussion. Thanks to Alex Mckenzie for posting this on the forum.
4. You can try to boot the machine with MS Windows 9x bootable floppy, and in the DOS command prompt, run: "fdisk /mbr".
5. You can try to boot the machine with MS Windows XP installation CD, enter recovery mode (by pressing F10 key in MS XP, for example), then in the console, run "fixmbr" to fix it. Maybe another command "fixboot" will help, too. For more info, refer to this doc
6. Use ntfsfixboot to fix it. This program is included in Clonezila live and its name is partclone.ntfsfixboot, and you can use it to adjust FS geometry on NTFS partitions. By default this should be done by Clonezilla with the option -e1 and -e2 checked. If not, you can force to do that again. For more info, please run "partclone.ntfsfixboot --help" or refer to http://sourceforge.net/projects/ntfsfixboot/.
7. Use ntfsreloc to adjust FS geometry on NTFS partitions. For more info, refer to http://www.linux-ntfs.org/doku.php?id=contrib:ntfsreloc. //NOTE// ntfsreloc is an older version of partclone.ntfsfixboot.
8. If you get error messages like "0xc0000225, 0xc00000e", and something about Winload.exe, refer to this.
9. Some more discussions are available here.
It has been confirmed that activating the -j0 option, usually fixes the problem.
This option doesn't work if you use LVM (Logical Volume Manager).
This option ends the restore process and enters command line prompt.
Postaction [^]
-p true Do nothing when the clone finishes
-p reboot Reboot client when the clone finishes
-p poweroff Shutdown client when the clone finishes
When image restoration finishes, do one of the following: choose action (default), poweroff or reboot.
Saving image files in NTFS partitions [^]
Although not recomended, you may find yourself having to save your image file in a NTFS (Windows XP) partition. You may never have a problem doing this, but you may get a message like the following one, when the partition gets mounted:
Volume is scheduled for check
Please boot into Windows TWICE, or use 'force' mount option"
and the backup procedure fails. There are two things you can do here:
Exit the program, reboot and use Windows XP Recovery Console to fix the NTFS file system. From Recovery Console prompt, execute the command:
chkdsk /f X:
where X: is the drive letter of the disk. When done, boot back into Clonezilla Live and repeat the backup procedure.
If the disk/partition you are trying to backup is not the Windows System disk (usually C:), you can boot Windows, and execute the command in a DOS window. To open a DOS window click Start / Run... and at the prompt Open: type cmd.
If Windows XP Recovery Console is not available, you don't have the time to execute the procedure described above, or even if you have executed it but you still get the same message, and you are absolutely sure that you get this message because the NTFS partition is really scheduled for check, and it's not because Windows crushed or have become corrupt, you can mount the patririon by hand and tell Clonezilla Live to use it. Assuming the partition is /dev/hda1, exit the program and execute the commands:
sudo su -
ntfs-3g -o force /dev/hda1 /home/partimag
ocs-liveand when you get to the screen "Mount clonezilla image directory", select
skip Use existing /home/partimag
If the Windows version you use is not XP and you're trying to backup the Windows System drive, boot into SystemRescueCD (graphical mode is not needed) and run the following command:
ntfsfix /dev/hda1
where /dev/hda1 is the partition name in GNU/Linux. When done, boot back into Clonezilla Live and repeat the backup procedure.
Getting backups [^]
In this page I will demonstrate the creation of an image file by getting a backup of a virtual disk (/dev/sdb). The image file will be saved in a partition in another virtual disk (/dev/sda1).
The first thing you do when you want to get a backup of a disk/partition, is make sure both the souce (to be backed up) and target (to hold the image file) partitions are in excellent condition (error free). This is the logical thing to do, cause I wouldn't want to backup a corrupt partition, or end up with a corrupt image file.
There is one more step I would want to take: I should check that my BIOS boot settings are correct, in order to boot from my CD/DVD drive.
Having done all of the above, I am ready to boot from Clonezilla-SysRescCD.
|
The following pressentation has been made using Clonezilla Live v 1.2.8-46 |
Getting the backup [^]
Clonezilla-SysRescCD starting screen [^]
If you're fine with US keymap and English language (available languages are English, Spanish, French, Italian, Japanese and Chinese [both simplified and traditional]) or don't mind editing the boot parameters, just select Clonezilla Live at the starting screen and press ENTER. When the system comes up, it will load the program that will preform the backup. After that continue from this step.
If you need to change these settings, select one of the available Clonezilla Live menu entries, and press TAB. The current boot parameters will be displayed.
The default parameters for booting Clonezilla Live on a 1024x768 screen, are the following:
append initrd=/live/initrd.img boot=live config nomodeset nolocales noprompt
noswap edd=on ocs_live_run="ocs-live-general" ocs_live_extra_param=""
ocs_prerun="/restorecd/prerun.normal" ocs_live_batch="no"
ocs_lang="en_US.UTF-8" ocs_live_keymap="NONE" vga=791
By deleting the words in red, you instruct Clonezilla Live to ask you the values of these parameters. When the appropriate changes have been done (as shown bellow), just press ENTER to boot.
append initrd=/live/initrd.img boot=live config nomodeset nolocales noprompt
noswap edd=on ocs_live_run="ocs-live-general" ocs_live_extra_param=""
ocs_prerun="/restorecd/prerun.normal" ocs_live_batch="no"
ocs_lang="" ocs_live_keymap="" vga=791
Screen "Choose Language" [^]
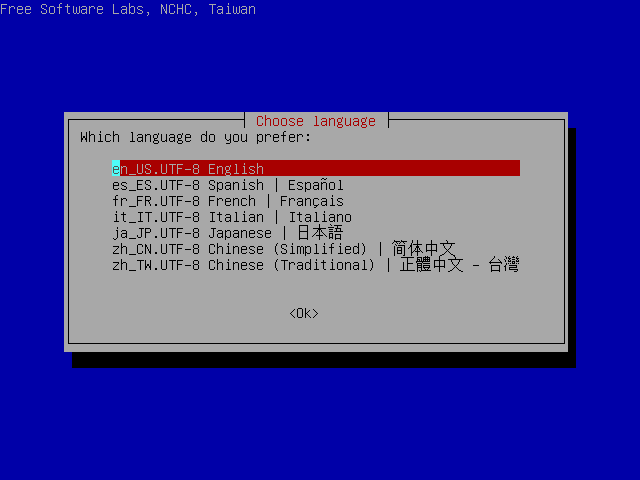
I select "en_US.UTF-8 English" and press ENTER.
Screen "Configuring console-data" [^]
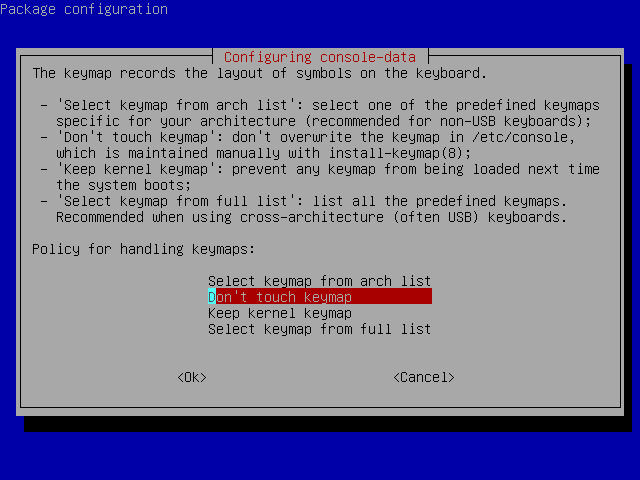
I select "Select keymap from full list" and press ENTER. If you're using US keymap, the default option "Don't touch keymap" is a better choice.
Screen "Configuring console-data" [^]
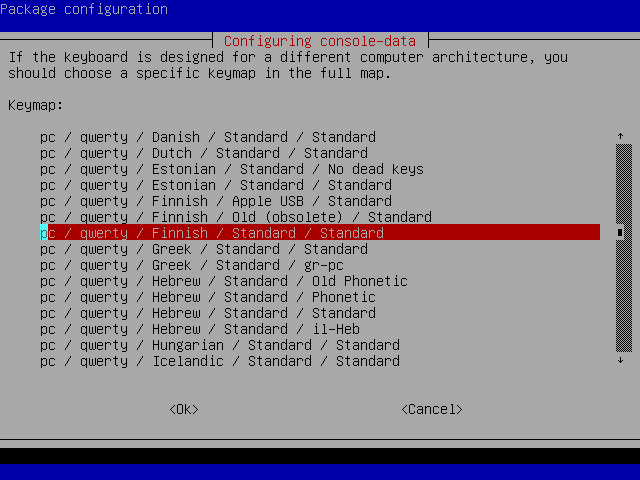
As I (the contributor who wrote a great deal of this page) use Finnish keyboard, I select "pc / qwerty / Finnish / Standard / Standard". Because you most likely use a different keyboard, choose the one you use.
Screen "Start Clonezilla" [^]
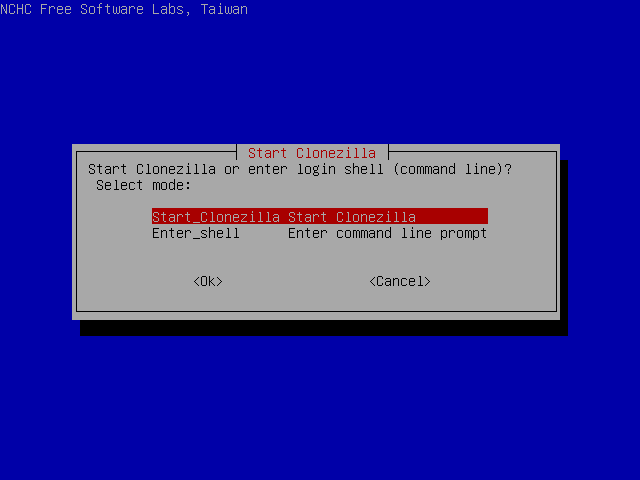
I select "Start Clonezilla" and press ENTER.
Screen "Clonezilla" [^]
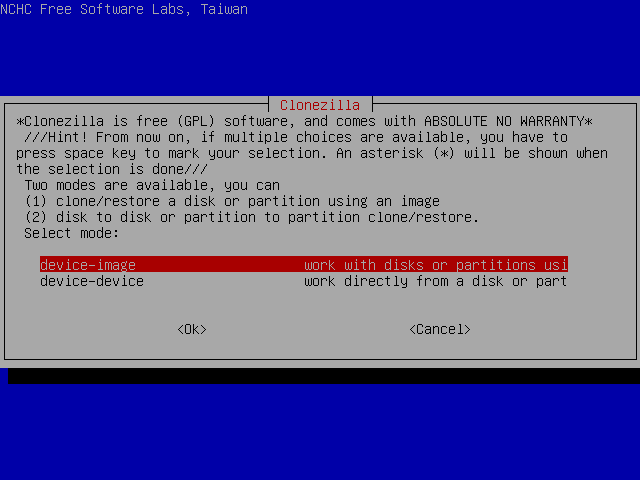
I select "device-image" and press ENTER.
Screen "Mount clonezilla image directory" [^]
In this screen I can select the way the image file directory will be saved.
Available options are local directory, remote directory through ssh, samba or nfs and skip, to use the previously used directory. More info about the image file can be found at section "About the Image file".
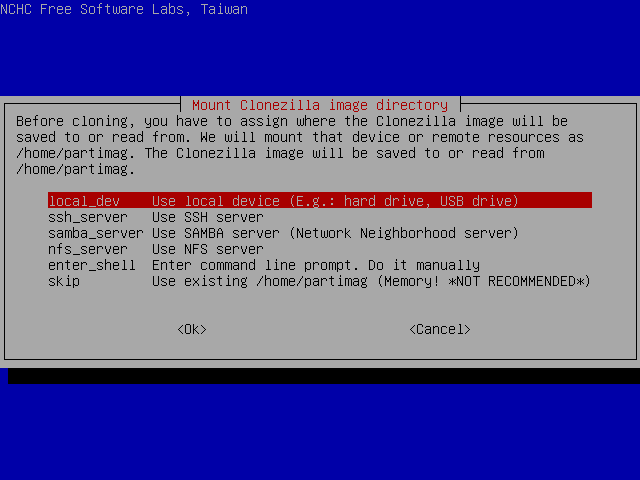
I select "local_dev" and press ENTER.
Next screen [^]
This is where I choose the location of the image file. It will be saved at the root directory of the selected partition.

I select partition sda1 and press ENTER.
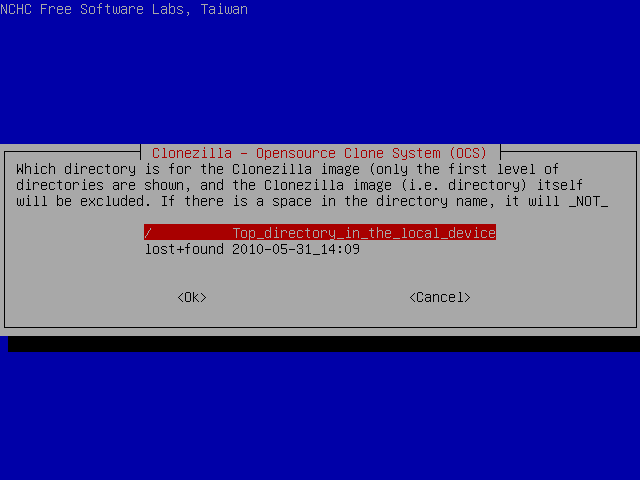
and then ENTER again.

This screen displays the mounting result.
As we can see, /dev/sda1 has been successfully mounted under /tmp/local-dev.
Next Screen [^]
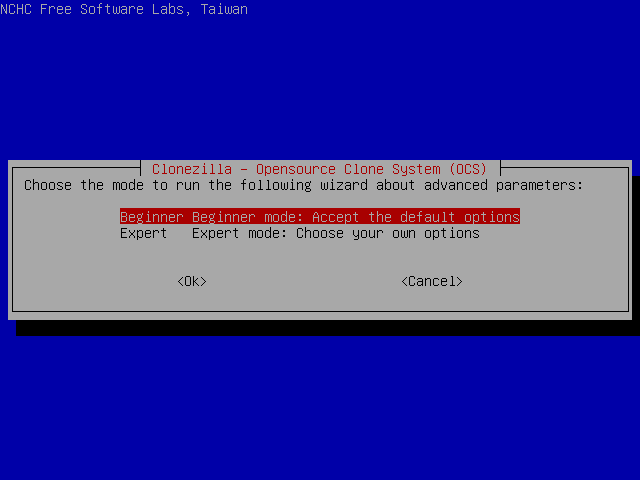
I select Beginner mode to accept the default backup options. If you select Expert mode, you can choose the options yourself. More details can be found here.
Screen "Select mode" [^]
Here I can select the desired operation.

I select "savedisk" and press ENTER.
Next Screen [^]
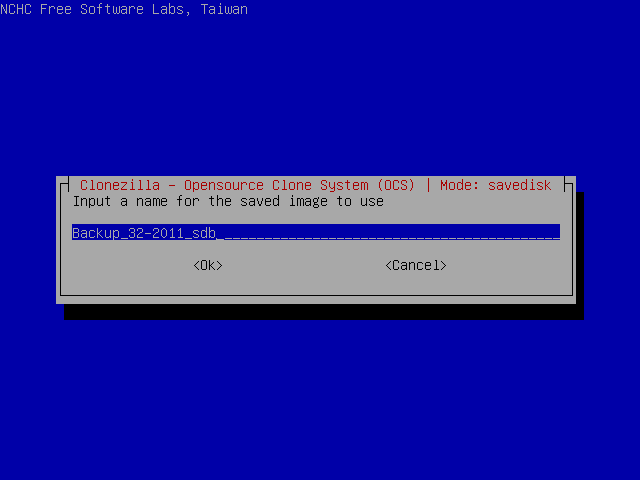
In this screen I select the image name.
I type "Backup_32-2011_sdb", which in my opinion is more informative name than the default.
Next Screen [^]
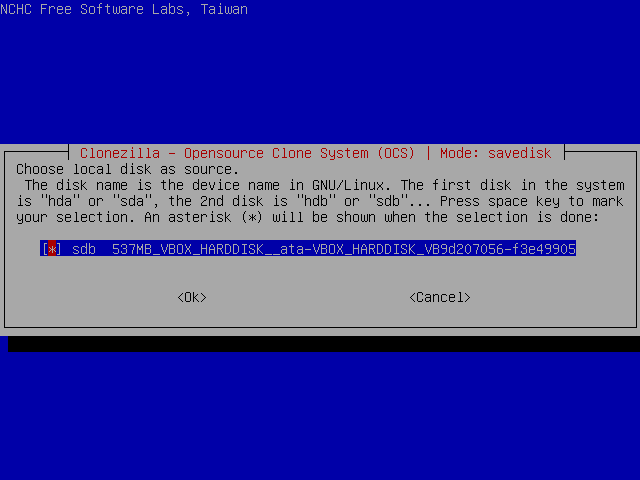
Then I am asked to select the disk to save.
I just press ENTER again.
Next screen [^]

And I press ENTER again to enable image validation.
Starting the backup [^]
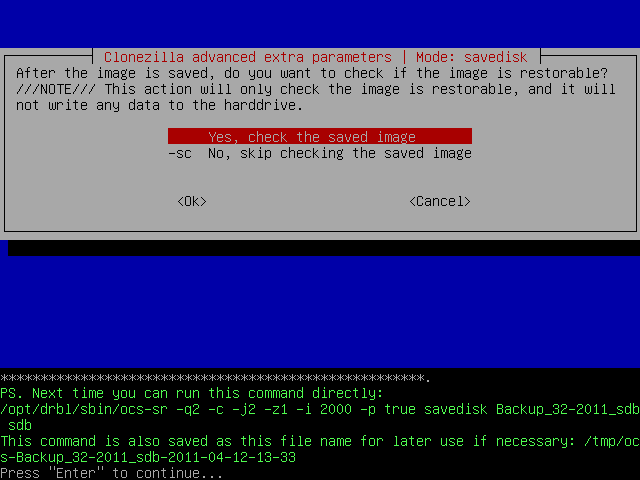
Then the program will display the command that will be executed and will ask me to press ENTER.
Then I will be asked to confirm the operation by pressing y and ENTER.
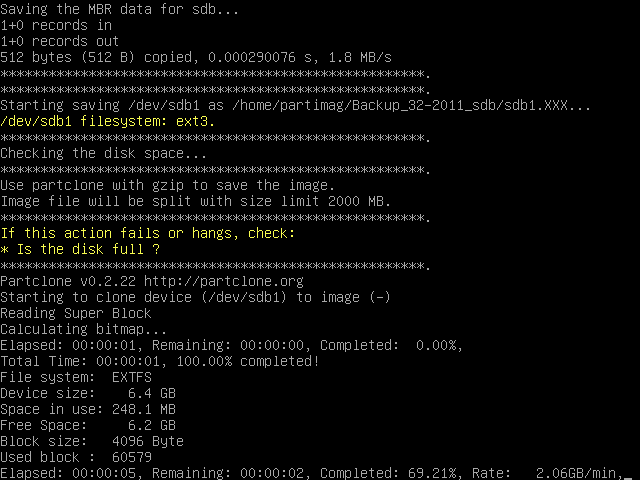
After that, the backup begins
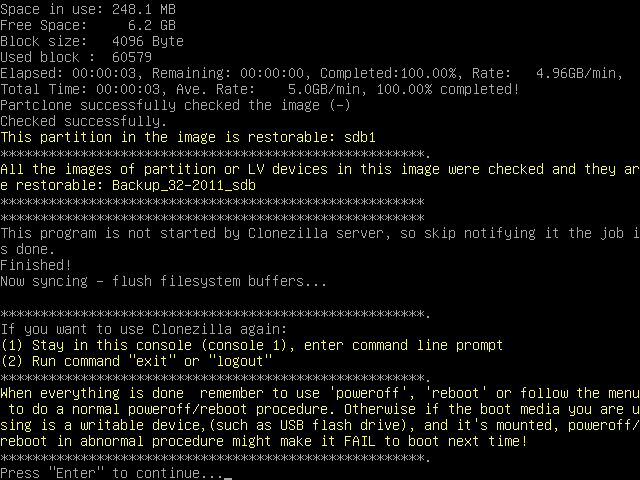
and when it's successfully completed, I press ENTER to get to the shell. Then, I execute the commands:
sudo su -
cd
umount -a
reboot
to reboot the system.
Getting backups on Samba [^]
What if you don't have a spare local disk or partition or a USB disk? How will you be able to get a backup of your system? Well, if your PC is on the same LAN with another PC running Windows (or linux), you can use Samba to save your image file on that remote PC (which we will call Samba server from now on).
Using Samba you will be able to mount a Windows share resource (or Samba share resource), from within Clonezilla Live, and save the image file there. Then you can boot that PC using SystemRescueCD and create a restore DVD.
In this page I will demonstrate the creation of an image file by getting a backup of my second disk (/dev/sdb). The image file will be save in my Samba server which is my laptop (ip: 10.0.0.3, Windows share resource name: all_my_images).
What is Samba? [^]
We read at http://us1.samba.org/samba/:
Samba is an Open Source/Free Software suite that provides seamless file and print services to SMB/CIFS clients. Samba is freely available, unlike other SMB/CIFS implementations, and allows for interoperability between Linux/Unix servers and Windows-based clients.
Samba is software that can be run on a platform other than Microsoft Windows, for example, UNIX, Linux, IBM System 390, OpenVMS, and other operating systems. Samba uses the TCP/IP protocol that is installed on the host server. When correctly configured, it allows that host to interact with a Microsoft Windows client or server as if it is a Windows file and print server.
Gathering info [^]
Before you can use this approach to get a backup, you have to get some info about the Samba server.
The Samba server I have used for this example was my laptop, so I already knew most of the info required. If this is not the case for you, just ask the owner, user or system admin.
The info required is:
- The IP address of the Samba server
- The domain on the Samba server
This may exist if your PC is connected to a larger LAN (a corporation network, for example). In my case this is empty. - The user name and password you can use
- The directory on the Samba server you can use to save your backup
This is the name of the Windows share resource (Samba share resource) as it is known in the network, which is not necessarily the same as the local directory name. The user whose account will be used to login to the Samba server, must have write permission to this directory.
Setting static IP
Clonezilla Live assumes that your network interface is to be configured through dhcp (auto IP assignment). This is easy to see in /etc/network/interfaces
auto lo
iface lo inet loopback
auto eth0
iface eth0 inet dhcp
In case you have to assign the IP by hand, you have to edit this file and add the relevant info. Assuming that the IP to be used would be 10.0.0.5, file /etc/network/interfaces would become:
auto lo
iface lo inet loopback
auto eth0
iface eth0 inet static
address 10.0.0.5
netmask 255.255.255.0
network 10.0.0.0
broadcast 10.0.0.255
gateway 10.0.0.1
Then, all that's left is to restart the network services, by execuitng the command:
/etc/init.d/networking restart
Getting the backup [^]
If you're fine with US keymap and English language (available languages are English, Spanish, French, Italian, Japanese and Chinese [both simplified and traditional]) or don't mind editing the boot parameters, just select Clonezilla Live at the starting screen and press ENTER. When the system comes up, it will load the program that will preform the backup.
If you need to change these settings, go to the Getting backups page for instructions .
Screen "Start Clonezilla" [^]
I select "Start Clonezilla" and press ENTER.
Screen "Clonezilla" [^]
I select "device-image" and press ENTER.
Screen "Mount clonezilla image directory" [^]
In this screen I can select the way the image file directory will be saved.
Available options are local directory, remote directory through ssh, samba or nfs and skip, to use the previously used directory. More info about the image file can be found at section "About the Image file".
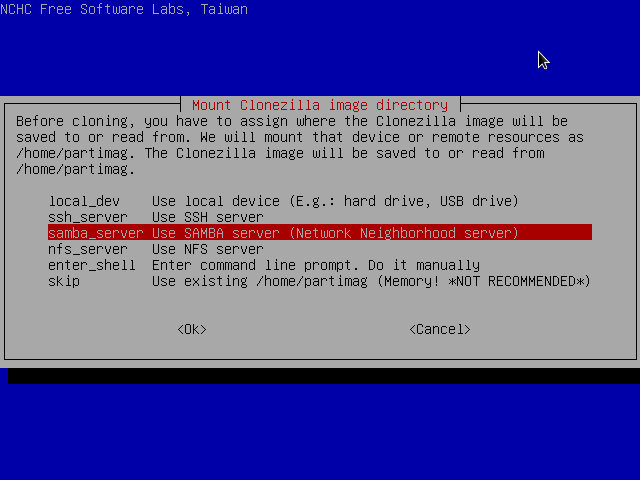
I select "samba server" and press ENTER.
Screen "Mount Samba Server" [^]
This is where I have to enter the IP address of my Samba server.

I type "10.0.0.3" and press ENTER.
Screen "Mount Samba Server" (second time) [^]
This is where I have to enter the domain name on my Samba server.

I just press ENTER, as there is no domain in my LAN. If there is a domain in your network, you have to type its name (something like my_company.com) and press ENTER.
Screen "Mount Samba Server" (third time) [^]
This is where I have to enter the account (user) name on my Samba server.
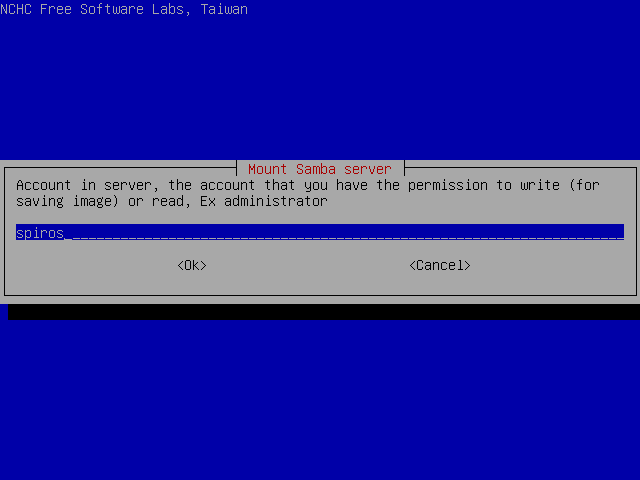
I type "spiros" and press ENTER.
Screen "Mount Samba Server" (fourth time) [^]
This is where I have to enter the directory name on my Samba server, in which the image file will be saved.
I type "/all_my_images" and press ENTER.
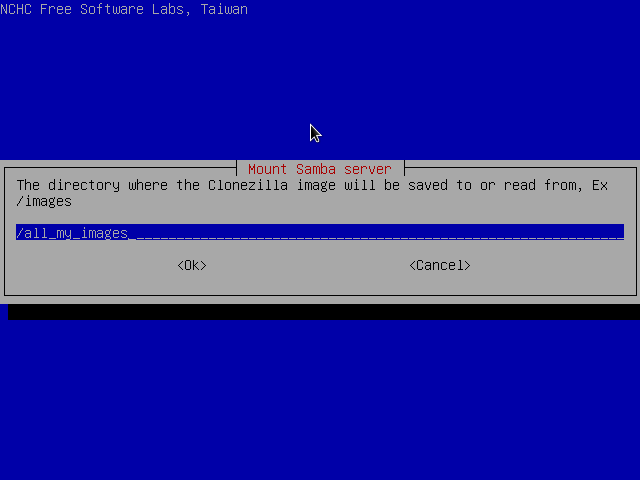
At this point I'm informed I'm going to be asked for the password for user spiros.
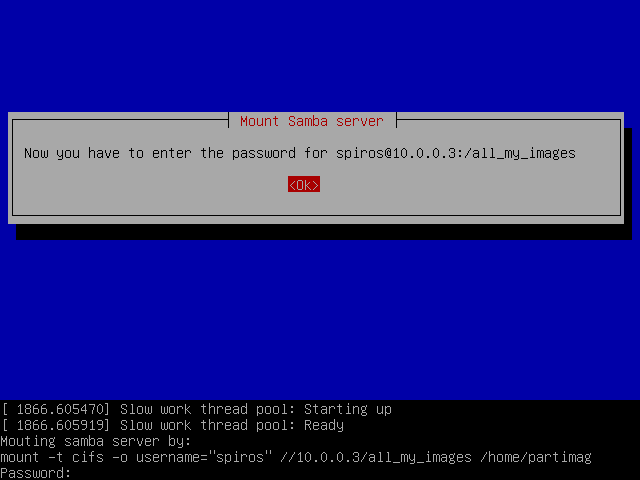
I will be able to continue only after entering it correctly.
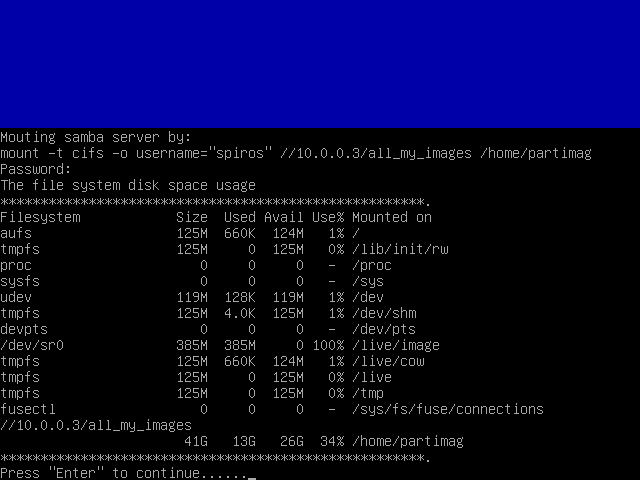
Screen "Clonezilla - Opensource Clone System (OCS)" [^]
I select Beginner mode to accept the default backup options. If you select Expert mode, you can choose the options yourself. More details can be found here.
Screen "Select mode" [^]
Here I can select the desired operation.
I select "savedisk" and press ENTER.
Next Screen [^]
In this screen I select the image name.
I type "Backup_32-2011_sdb", which in my opinion is more informative name than the default.
Next Screen [^]
Finally I am asked to select the disk to save.
I just press ENTER again.
Next screen [^]
And I press ENTER again to enable image validation.
Starting the backup [^]
Then the program will display the command that will be executed and will ask me to press ENTER.
Then I will be asked to confirm the operation by pressing y and ENTER.
After that, the backup begins
and when it's successfully completed, I press ENTER to get to the shell. Then, I execute the commands:
sudo su -
cd
umount -a
reboot
to reboot the system.
Restoring data [^]
Image files are always created for one purpose: restoring the data they contain. Images can be, for example, a backup solution: as long as hardware works, the computer can be restored to the state it was when creating the image. Another usage scenario is changing the hard drive: files can be copy-pasted from the old drive to the new, but that method doesn't make the new drive bootable. Disk images do.
This page contains a demonstration of the latter case. On the Getting backups page, a 500 MB virtual disk containing 160 megabytes of data was copied to a 2 GB virtual disk which was empty. Now the 500 MB disk is changed to an empty 2 GB disk (still virtual) and I'll restore the data to that disk.
When creating a disk image, one needs to check that both the source and target partitions are error free. That's not required when the image is restored, because restoration process can't damage the disk image. Note, however, that restoring an image erases all the data in the target disk/partition.
You also need to check the BIOS settings to be able to boot from Clonezilla-SysRescCD. Some BIOSes contain a boot menu, others require editing settings pernamently. Details can be found on the manual of the motherboard or laptop.
Now let's boot.
|
Restore process erases all the data on the target disk/partition. Before restoring make sure you have backup of all the data on the target disk/partition, even if the filesystem is corrupted. |
|
The following pressentation has been made using Clonezilla Live v 1.2.8-46 |
Restoring data [^]
Clonezilla-SysRescCD starting screen [^]
If you're fine with US keymap and English language (available languages are English, Spanish, French, Italian, Japanese and Chinese [both simplified and traditional]) or don't mind editing the boot parameters, just select Clonezilla Live at the starting screen and press ENTER. When the system comes up, it will load the program that will preform the backup. After that continue from this step.
If you need to change these settings, select one of the available Clonezilla Live menu entries, and press TAB. The current boot parameters will be displayed.
The default parameters for booting Clonezilla Live on a 1024x768 screen, are the following:
append initrd=/live/initrd1.img boot=live union=aufs
ocs_live_run="ocs-live-general" ocs_live_extra_param=""
ocs_prerun="/live/image/restorecd/prerun.normal" ocs_live_batch="no"
ocs_lang="en_US.UTF-8" ocs_live_keymap="NONE" vga=791 nolocales
By deleting the words in red, you instruct Clonezilla Live to ask you the values of these parameters. When the appropriate changes have been done (as shown bellow), just press ENTER to boot.
append initrd=/live/initrd1.img boot=live union=aufs
ocs_live_run="ocs-live-general" ocs_live_extra_param=""
ocs_prerun="/live/image/restorecd/prerun.normal" ocs_live_batch="no"
ocs_lang="" ocs_live_keymap="" vga=791 nolocales
Screen "Choose Language" [^]
I select "en_US.UTF-8 English" and press ENTER.
Screen "Configuring console-data" [^]
I select "Select keymap from full list" and press ENTER. If you're using US keymap, the default option "Don't touch keymap" is a better choice.
Screen "Configuring console-data" [^]
Because I haven't changed my keyboard, I select "pc / qwerty / Finnish / Standard / Standard". Because you most likely use a different keyboard, choose the one you use.
Screen "Start Clonezilla" [^]
I select "Start Clonezilla" and press ENTER.
Screen "Clonezilla" [^]
I select "device-image" and press ENTER.
Screen "Mount clonezilla image directory" [^]
In this screen I can select the way the image file directory has been saved.
Available options are local directory, remote directory through ssh, samba or nfs and skip, to use the previously used directory. More info about the image file can be found at section "About the Image file".
I select "local_dev" and press ENTER.
Next screen [^]
This is where I choose the location of the image file.

I select partition sda1 and press ENTER.
and then ENTER again.
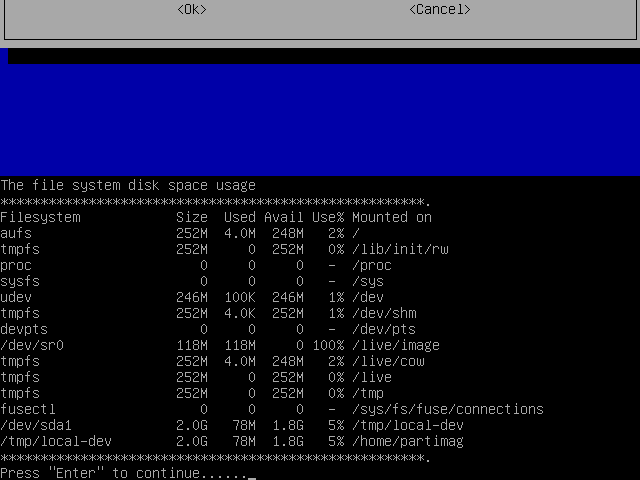
This screen displays the mounting result.
As we can see, /dev/sda1 has been successfully mounted under /tmp/local-dev.
Next Screen [^]
I select Beginner mode to accept the default restore options. If you select Expert mode, you can choose the options yourself. More details can be found here.
Screen "Select mode" [^]
Here I can select the desired operation.
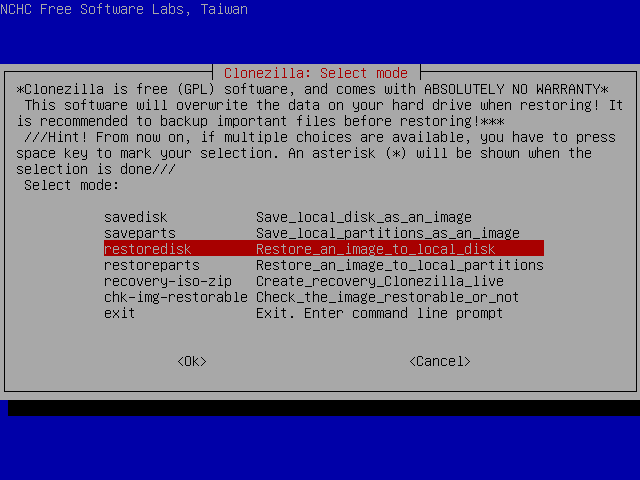
I select "restoredisk" and press ENTER.
Next Screen [^]
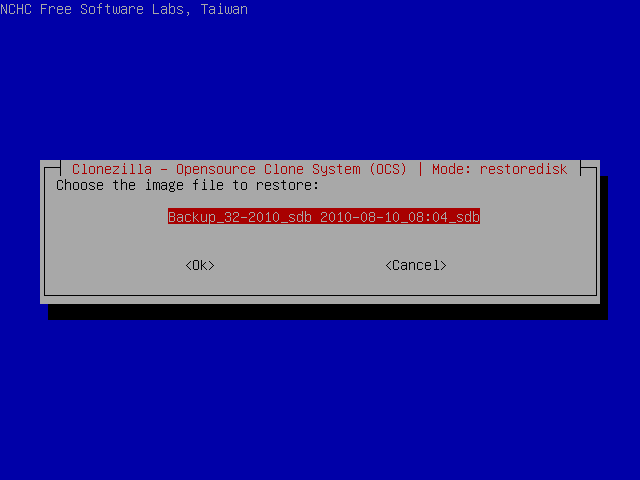
In this screen I select the image folder. This partition contains only one image.
Next Screen [^]
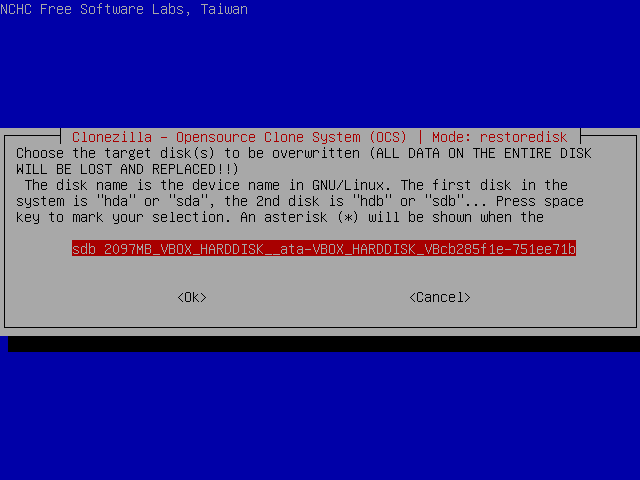
Finally I am asked to select which disk the image will be restored to. After double-checking the disk doesn't contain anything important, I press ENTER.
Starting the restoration [^]
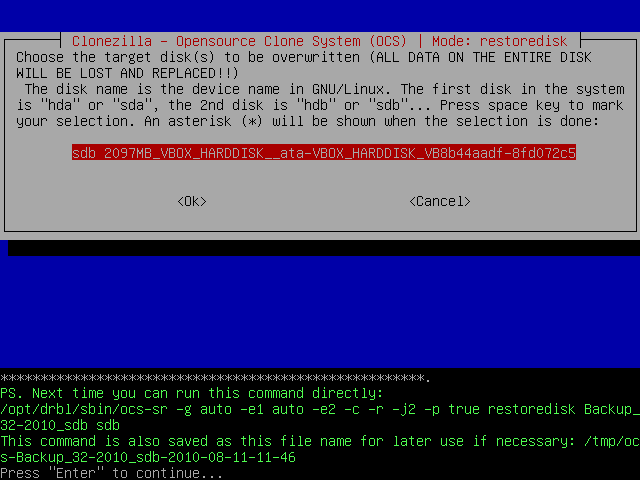
Then the program will display the command that will be executed and will ask me to press ENTER.
Then I will be asked to confirm the operation by pressing y and ENTER.
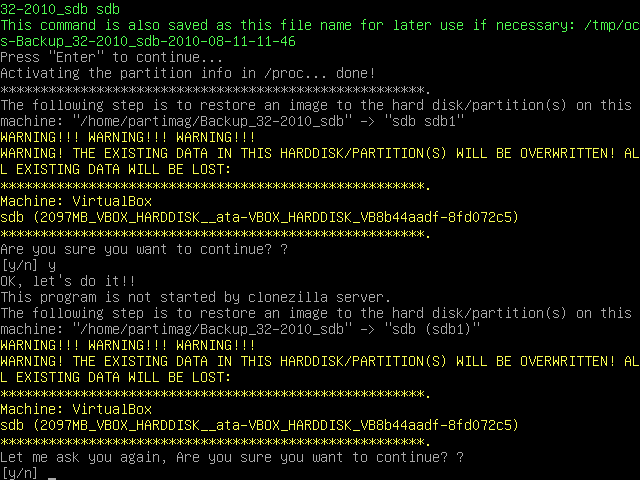
|
This is the last confirmation Clonezilla Live asks. After this step there is no coming back. |
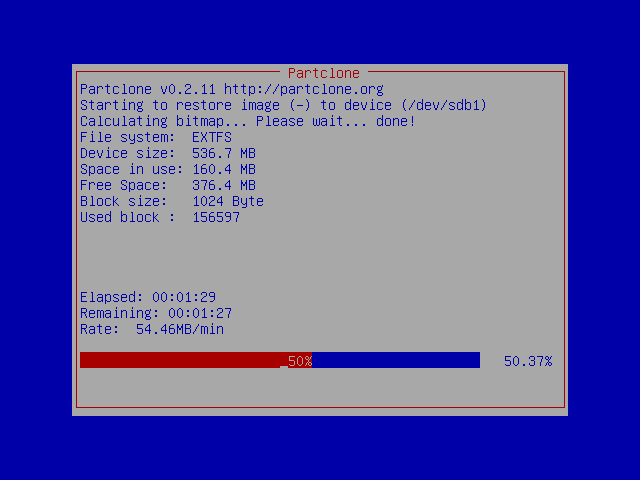
After that, the restore process begins
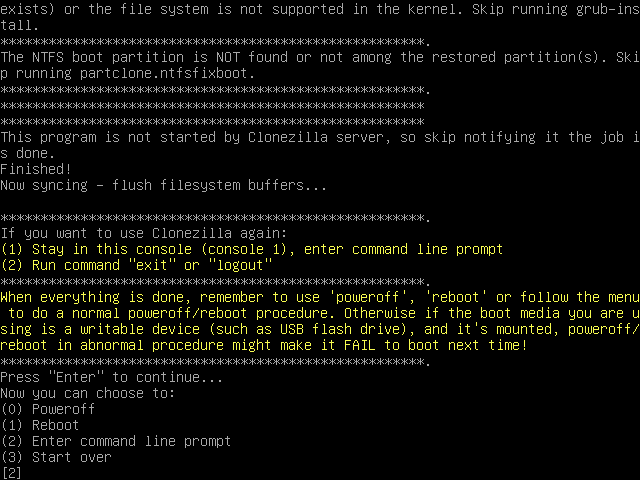
and when it's successfully completed, I press ENTER to get to the shell. Then, I execute the commands:
sudo su -
cd
umount -a
reboot
to reboot the system.
Creating a Restore DVD - Part 1 [^]
Assuming you have used Clonezilla Live to make a backup of your system (disk /dev/sdb), you will probably be wondering what to do with it now. Well, one option would be to keep it to the disk you used to save it in, store the disk, and use it whenever you need it. Another option would be to create a DVD you can use to restore this image.
Before, up to Clonezilla-SysRescCD 2.6.0, the process to create an automated restore DVD required entering command line prompt and writing some commands, which can be uncomfortable or even difficult for many people.
Later, a TUI option to create an automated recovery disc was added to Clonezilla Live, and ocs-iso script included in Clonezilla-SysRescCD 3.1.0 and newer has a TUI too. Old command-line options are no longer supported. This page walks you through the creation of an automated restore DVD via TUI.
You have to boot Clonezilla Live, using Clonezilla-SysRescCD.
|
The following pressentation has been made using Clonezilla Live v 1.2.8-46 |
Creating the disk image [^]
Clonezilla-SysRescCD starting screen [^]
If you're fine with US keymap and English language (available languages are English, Spanish, French, Italian, Japanese and Chinese [both simplified and traditional]) or don't mind editing the boot parameters, just select Clonezilla Live at the starting screen and press ENTER. When the system comes up, it will load the program that will preform the backup. After that continue from this step.
If you need to change these settings, select one of the available Clonezilla Live menu entries, and press TAB. The current boot parameters will be displayed.
The default parameters for booting Clonezilla Live on a 1024x768 screen, are the following:
append initrd=/live/initrd1.img boot=live union=aufs
ocs_live_run="ocs-live-general" ocs_live_extra_param=""
ocs_prerun="/live/image/restorecd/prerun.normal" ocs_live_batch="no"
ocs_lang="en_US.UTF-8" ocs_live_keymap="NONE" vga=791 nolocales
By deleting the words in red, you instruct Clonezilla Live to ask you the values of these parameters. When the appropriate changes have been done (as shown bellow), just press ENTER to boot.
append initrd=/live/initrd1.img boot=live union=aufs
ocs_live_run="ocs-live-general" ocs_live_extra_param=""
ocs_prerun="/live/image/restorecd/prerun.normal" ocs_live_batch="no"
ocs_lang="" ocs_live_keymap="" vga=791 nolocales
Screen "Choose Language" [^]
I select "en_US.UTF-8 English" and press ENTER.
Screen "Configuring console-data" [^]
I select "Select keymap from full list" and press ENTER. If you're using US keymap, the default option "Don't touch keymap" is a better choice.
Screen "Configuring console-data" [^]
Because I haven't changed my keyboard, I select "pc / qwerty / Finnish / Standard / Standard". Because you most likely use a different keyboard, choose the one you use.
Screen "Start Clonezilla" [^]
I select "Start Clonezilla" and press ENTER.
Screen "Clonezilla" [^]
I select "device-image" and press ENTER.
Screen "Mount clonezilla image directory" [^]
In this screen I can select the way the image file directory has been saved.
Available options are local directory, remote directory through ssh, samba or nfs and skip, to use the previously used directory. More info about the image file can be found at section "About the Image file".
I select "local_dev" and press ENTER.
Next screen [^]
This is where I choose the location of the image file.
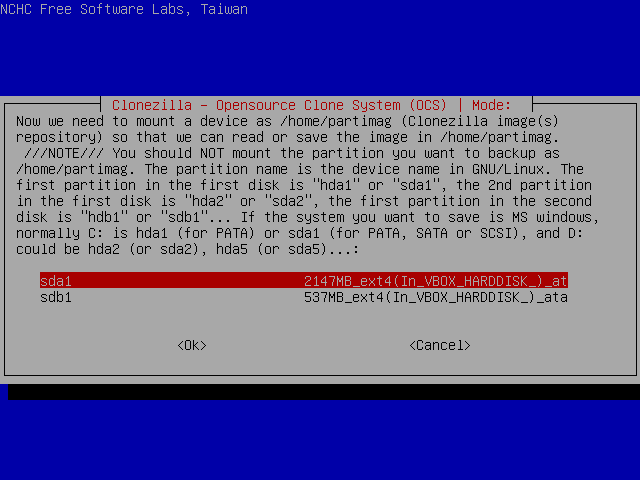
I select partition sda1 and press ENTER.
and then ENTER again.

This screen displays the mounting result.
As we can see, /dev/sda1 has been successfully mounted under /tmp/local-dev.
Next Screen [^]
I select Beginner mode to accept the default restore options, which are used if the recovery disk is ever used. If you select Expert mode, you can choose the options yourself. More details can be found here.
Screen "Clonezilla: Select mode" [^]
Here I can select the desired operation.
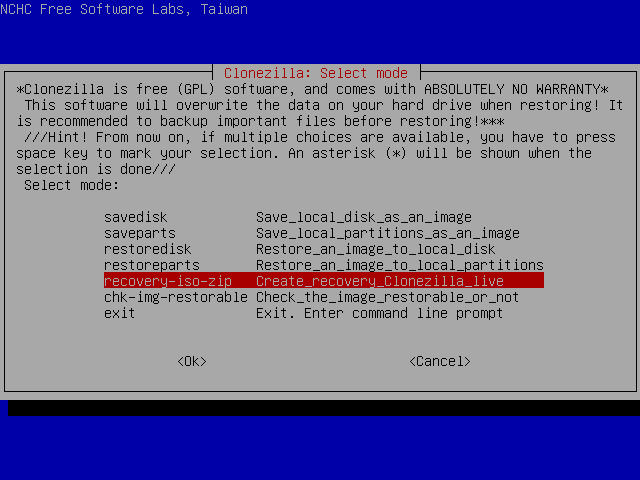
I select "recovery-iso-zip" and press ENTER.
Next Screen [^]
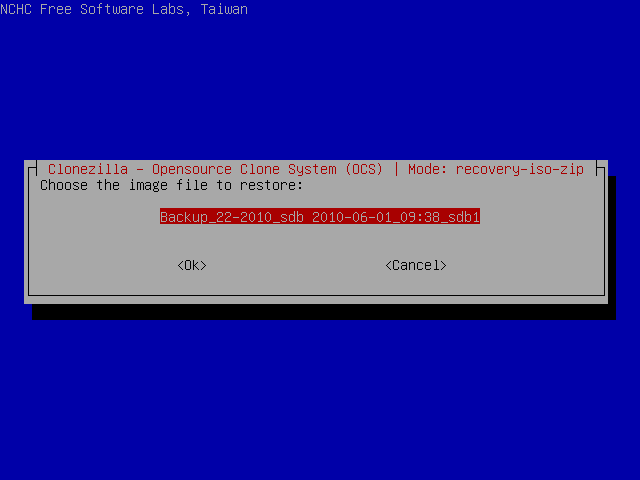
In this screen I select the image folder. This partition contains only one image.
Next Screen [^]
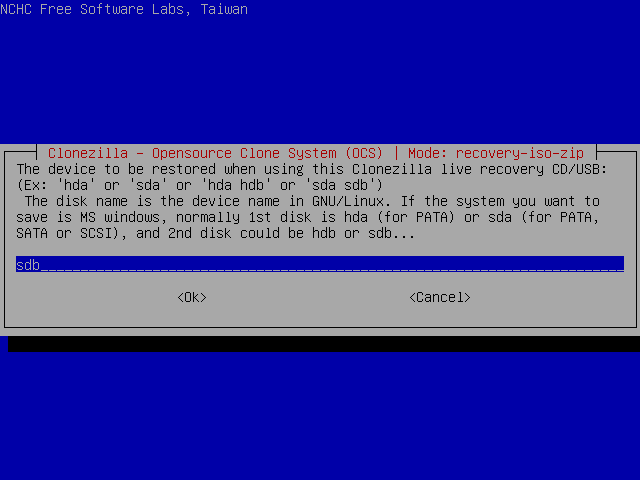
Now I am asked to select which disk the image will be restored to, if the recovery disc is used. Because this image is a backup, I choose the same disk where the original data resides. If you're upgrading your hard drive, choose the new drive.
Next Screen [^]
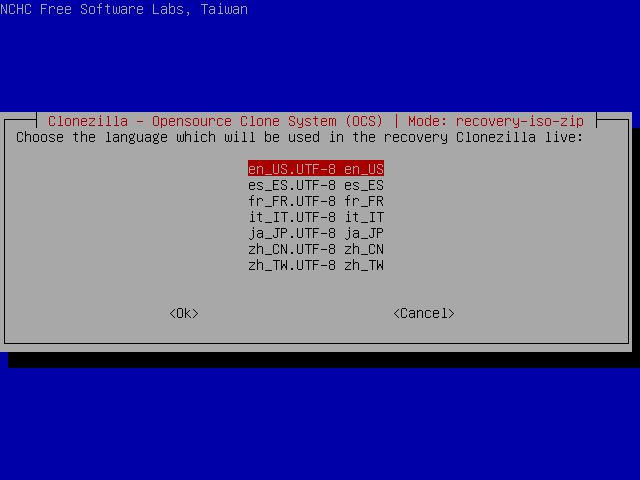
In this screen I can select the language that the recovery disc uses. I choose "en_US.UTF-8".
Next Screen [^]
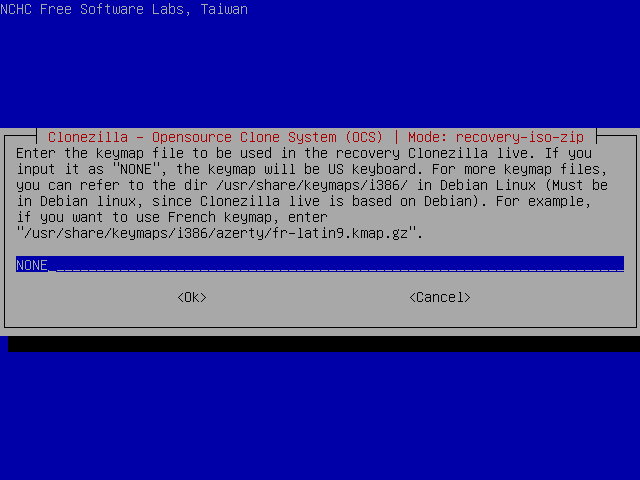
This screen allows me to select the keymap that the recovery disc uses. Unfortunately, changing the keymap requires knowing where the keymap file resides in Debian GNU/Linux. Because I don't know it, I just press ENTER to accept US keymap.
Next Screen [^]
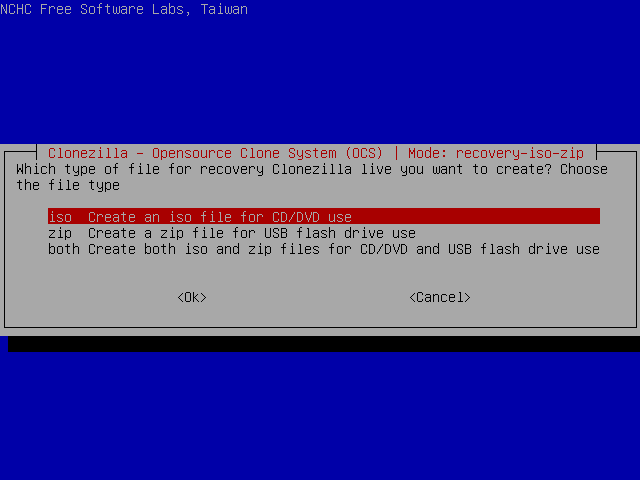
I select "iso" to create a CD/DVD disk image which I can burn to a recordable CD/DVD disc. The good thing about recordable discs is that overwriting the backup by accident is impossible. The "zip" option creates a ZIP file which can be used to create a bootable pendrive or external hard drive.
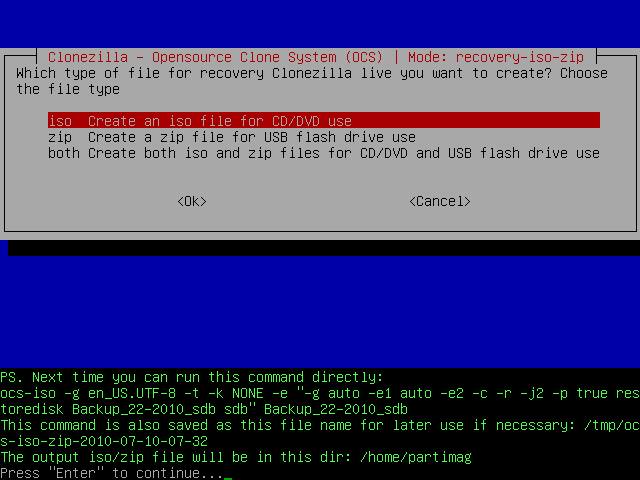
Then the program will display the command that will be executed and will ask me to press ENTER.
Screen "Excessive Image Size" [^]
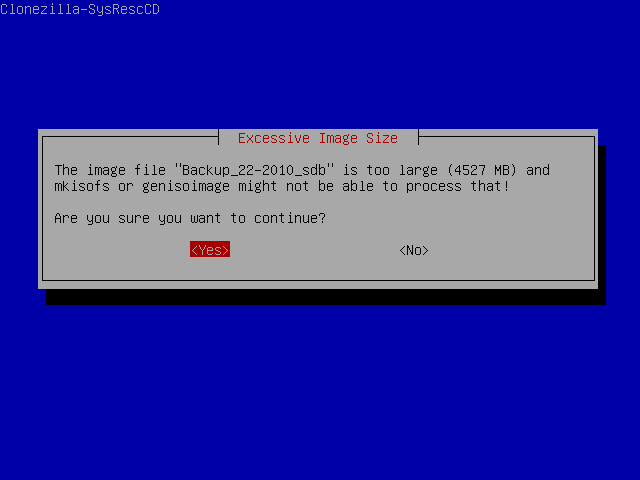
You will see this screen if the image file you're about to create is larger than a single layer DVD. The screen warns that mkisofs or genisoimage (the programs which actually create the image) might be unable to process a disk image that big. However, even bigger problem is that you need a dual layer DVD or Blu-ray disc to burn the image.
Screen "Customization section" [^]
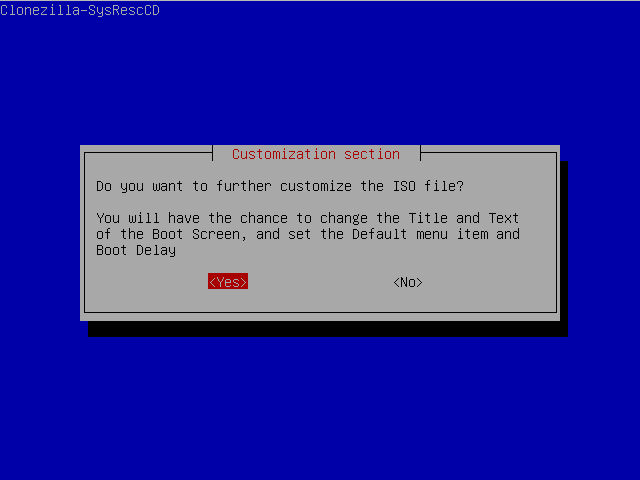
Now I am asked if I want to customize the boot menu of the disc. I answer "Yes". If you don't want to customize the menu, continue from this step.
Screen "DVD Title" [^]
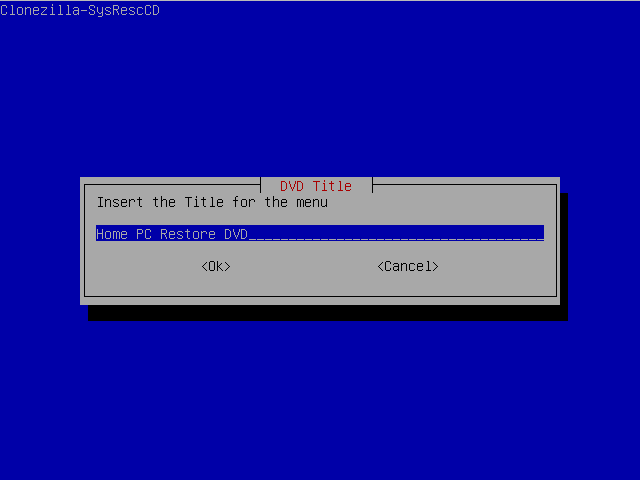
In this screen I select the title of the boot menu. I type "Home PC Restore DVD".
Screen "Menu Items Caption" [^]
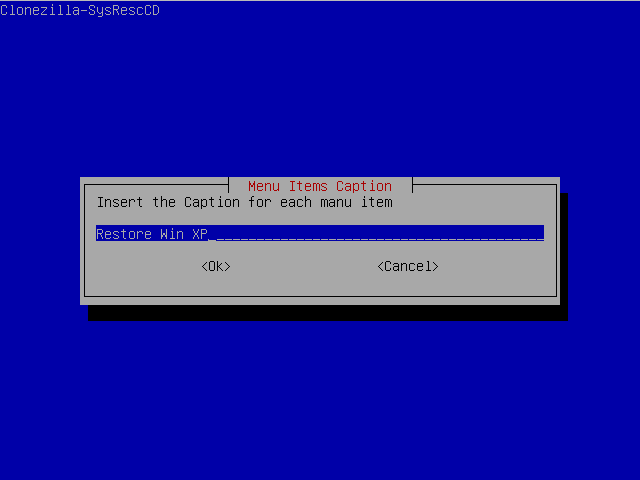
This screen allows me to select the caption for all menu items. I enter "Restore Win XP".
Screen "Boot delay" [^]
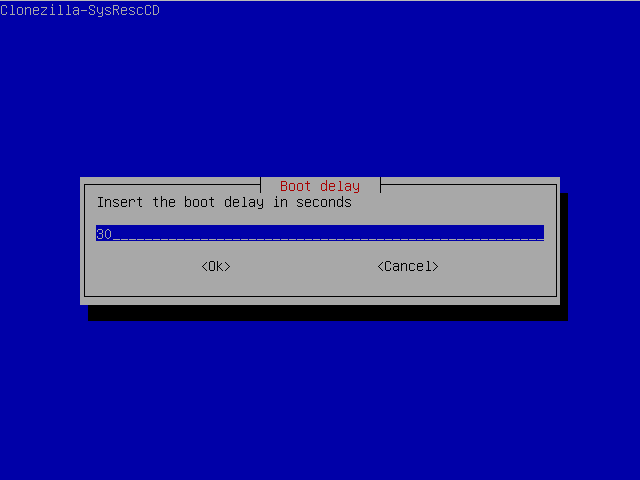
I press ENTER to accept the default delay of 30 seconds. It means that when a computer is booted from the restore disc, it waits 30 seconds before choosing the default option automatically. You may want to reduce this delay if, for example, your keyboard doesn't work in boot menu and you must wait until the delay ends.
Screen "Default Boot Item" [^]
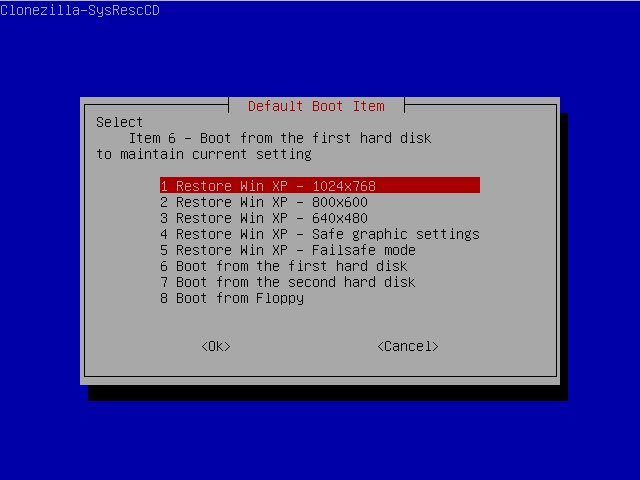
In this screen I can select the default option of the menu. Selecting one of the options that restore the image makes using the disc even easier, but also raises the risk that the image is restored accidentally. Another reason to select such option may be that your keyboard doesn't work in boot menu, preventing you from choosing any non-default option. I select the first option that restores the image using pixel dimensions of 1024*768.
Screen "Boot Screen Image" [^]
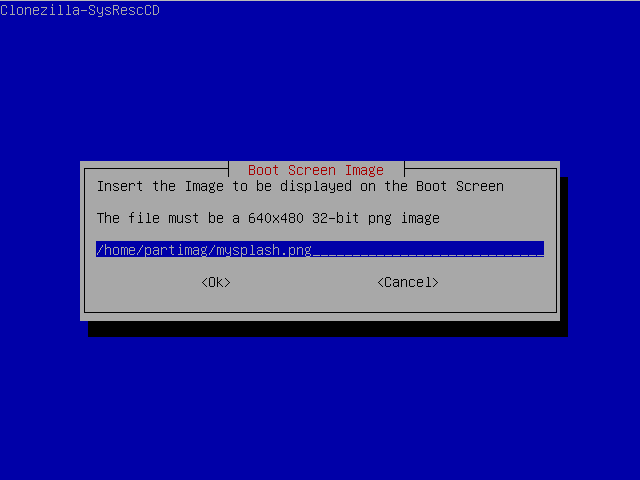
This screen allows me to select the background picture of the menu. Note that the picture must be in the same partition that contains the disk image, if you don't mind entering command line and mounting the right partition manually. I choose picture mysplash.png in the root of the partition. Because the partition has been mounted in /home/partimag, the full path of the picture is /home/partimag/mysplash.png.
Screen "ISO Label" [^]
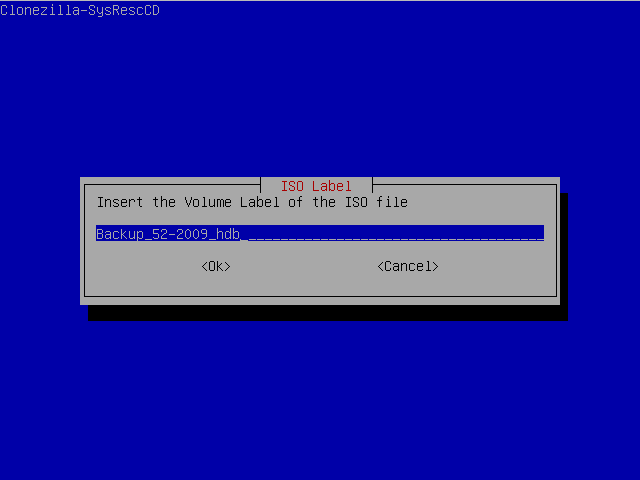
In this screen I can select the volume label of the disc. Volume label is the name of the disc you may see in various situations, for example in the notification you see when you insert the disc into your DVD writer. I type "Backup_52-2009_hdb".
Screen "Publisher ID" [^]
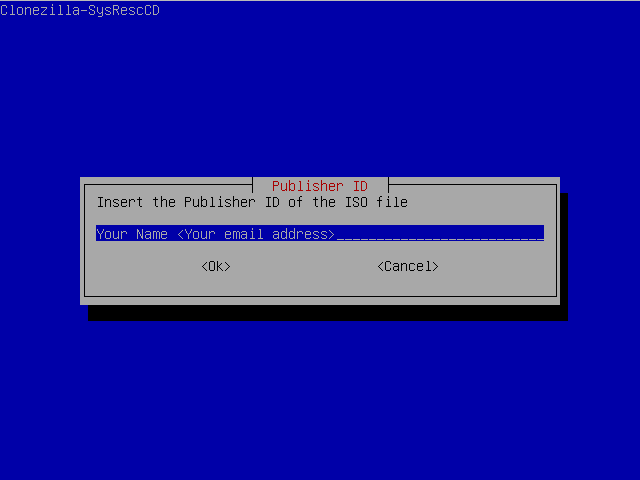
This is where I choose the publisher ID of the ISO file and the disc. Publisher ID means the person or company who created the disc. However, at least in GNU/Linux reading the publisher ID is, strictly speaking, a challenge. Here are instructions to read the publisher ID of a ISO file. I didn't find any working instructions to read the ID from the disc.
Starting the creation of the disk image [^]
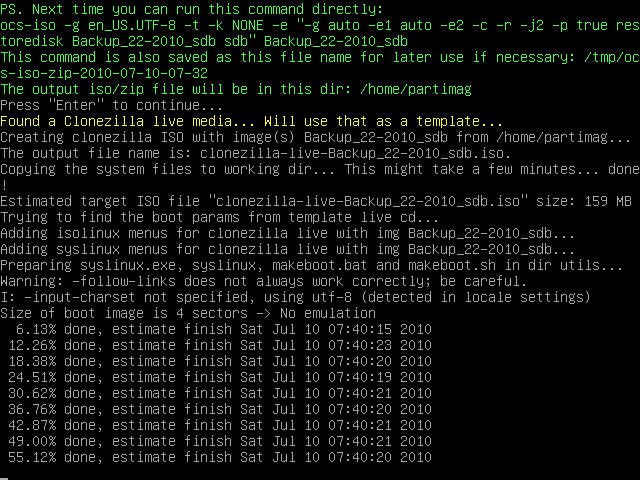
After that, creation of the disk image begins. Note that no confirmation is asked it the disk image is small enough to fit to a CD.
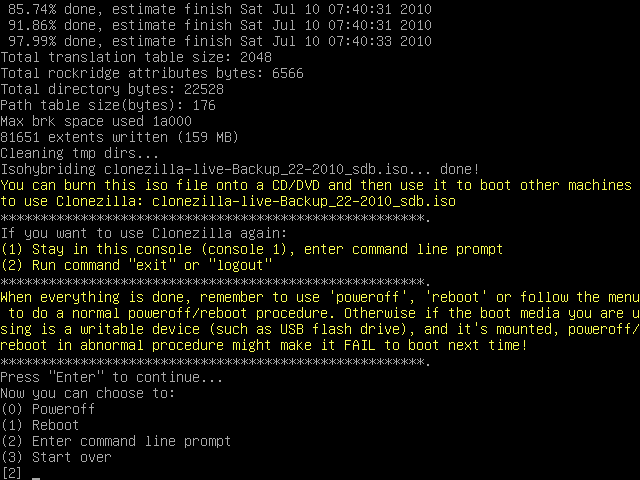
When the disk image is successfully created, I must reboot in order to burn the disc because my DVD burner is still in use. Clonezilla Live can be loaded into computer memory during boot in order to be able to burn disc(s) within it. However, due to a known bug, the disk image can't be created if Clonezilla Live has been loaded into memory. (source) Thus, I press 1 and ENTER to reboot to another operating system and burn the image using graphical burning program. Follow this link for instructions. If you've created a ZIP file, follow this one instead.
What to do with the disk image [^]
The previous page contains partial instructions to create an automated recovery DVD. They're partial because they only tell how the disk image can be created, not what one should do with the image. Of course, partial instructions are not enough, but don't worry - this page is the other part.
Earlier versions of Clonezilla Live allowed creating the DVD without reboot, but it's no longer possible due to a known bug. The disk image can't be created if Clonezilla Live has been loaded into memory (source) and the image can't be burned to disc if Clonezilla Live isn't in memory. And if the computer must be rebooted anyway, it's a good idea to use one's favorite operating system and a graphical burning program for burning the disc. Doing so also allows reading these instructions while burning the disc.
This page walks through burning the disc by using ImgBurn and K3b. The instructions can be adapted for many other burning programs as well. If your burning program is too different, download either of the programs mentioned - they both can be downloaded for free.
In addition to a DVD, bootable pendrive or external hard drive can be created as well. If you want to do so, follow instructions below.
Before following these instructions, insert a writable DVD or Blu-ray disc to your burner.
Burning the disc [^]
Using ImgBurn [^]
ImgBurn is a lightweight but very feature-rich disc burning program. It only requires about two megabytes disk space and contains a lot of settings. ImgBurn is closed-source freeware and - unfortunately - Windows-only software. I (Jyrki) personally use ImgBurn when burning discs within Windows.
Launch ImgBurn and press Write image file to disc. Select the disk image you just created.
At the settings window, keep Test Mode disabled. I also recommend keeping the Verify option enabled. Verifying the integrity of the disc after burning requires time and doesn't prevent the disc from becoming a so-called coaster, but it allows you to know immediately if the burning attempt failed, so you can try burning the disc again.
Keep the number of copies as 1 (or increase it, if you really want multiple copies of the disc). Use your best judgment while choosing the burning speed: according to this forum thread lowering the burning speed gives very mixed results in quality. I personally use ¾ of the maximum speed of the disc, for example 12x on a disc rated 16x.
After choosing the settings, press the big picture at the bottom-left of the window. Don't do anything that requires much computer resources while burning, because doing so increases the likelihood of burning failure.
That's it. You own now an automated recovery disc.
Using K3b [^]
K3b (KDE Burn Baby Burn) is the disc burning program included in KDE Software Compilation. It comes with most, if not all, KDE-based GNU/Linux distributions. It can also be installed on other distributions, but I recommend against doing so - K3b requires KDE base packages to be installed, and it doesn't make much sense to install KDE base only for K3b.
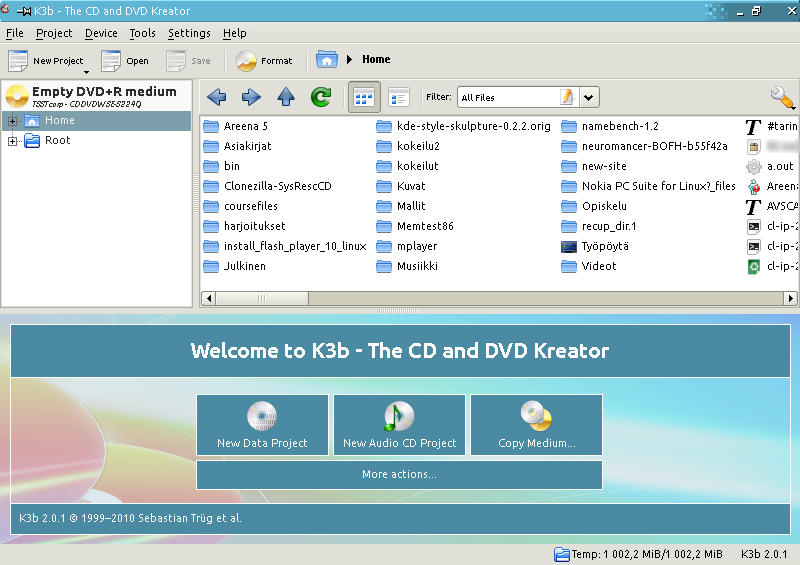
I launch K3b and navigate to the folder where the disk image resides.
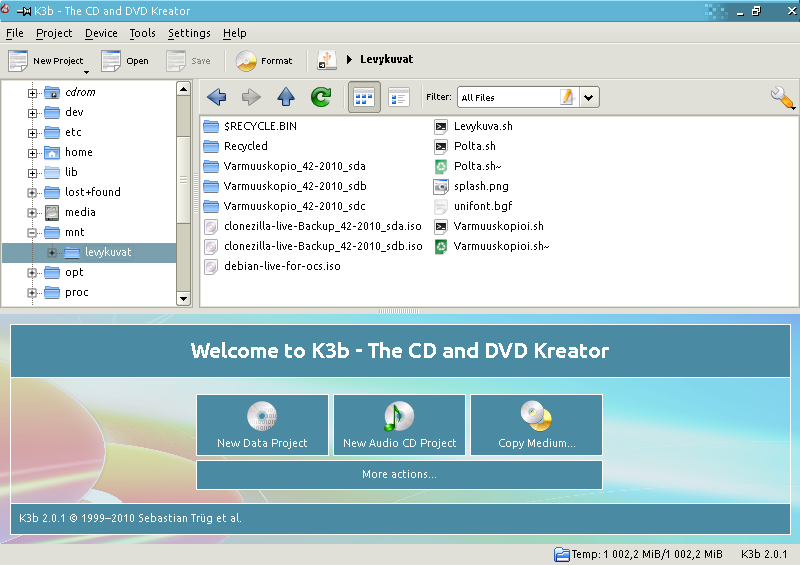
I double-click the file clonezilla-live-Backup_42-2010_sda.iso.
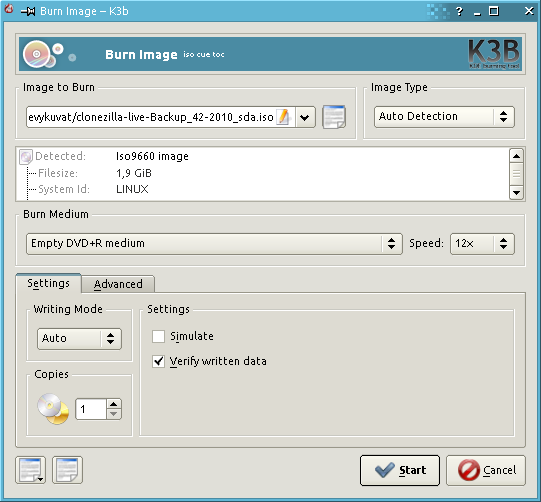
This window allows me to choose burning settings. I don't touch Image Type or Burn Medium, because they're auto-detected anyway. The maximum burning speed allowed by the disc is 16x, so I choose speed 12x. According to this forum thread low burning speed can decrease burning quality, so I always use speed near the maximum speed of the disc.
I keep Writing Mode as Auto and number of copies as 1. I also keep the Simulate option disabled and enable the Verify written data option. The latter allows me to notice immediately if the burning attempt failed, so I can try burning the disc again, rather than owning a so-called coaster and relying on it if something happens to my data...
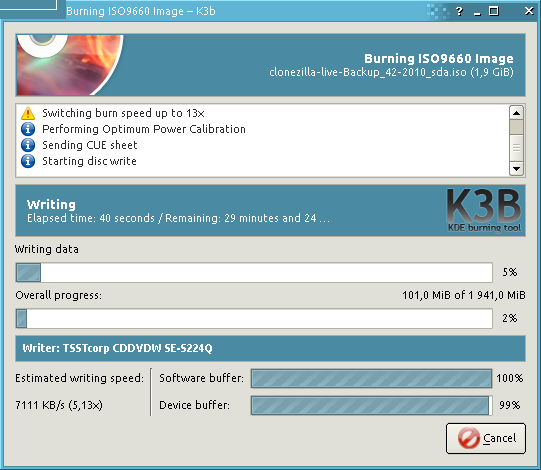
I click Start and the burning process begins.
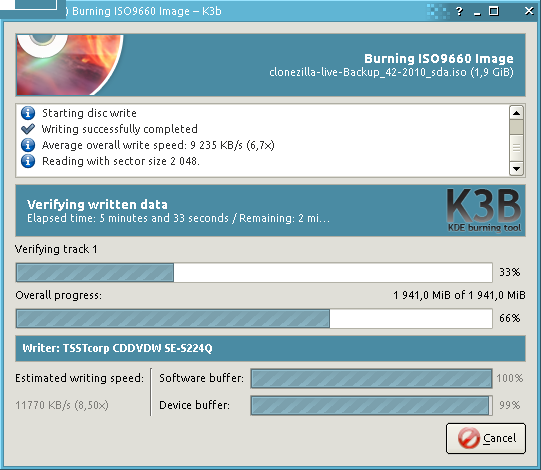
Because I enabled the Verify written data option, K3b starts verifying the integrity of the disc right after burning.
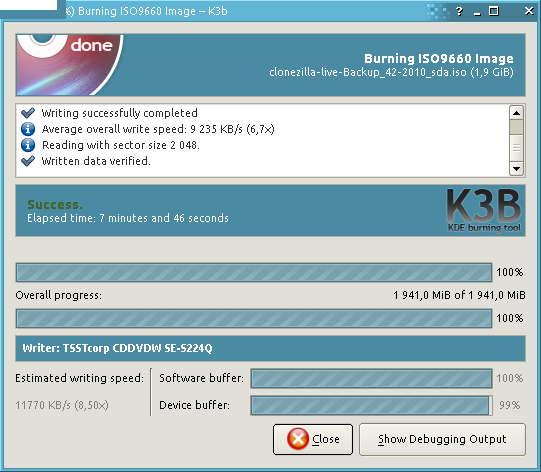
The burning attempt succeeded.
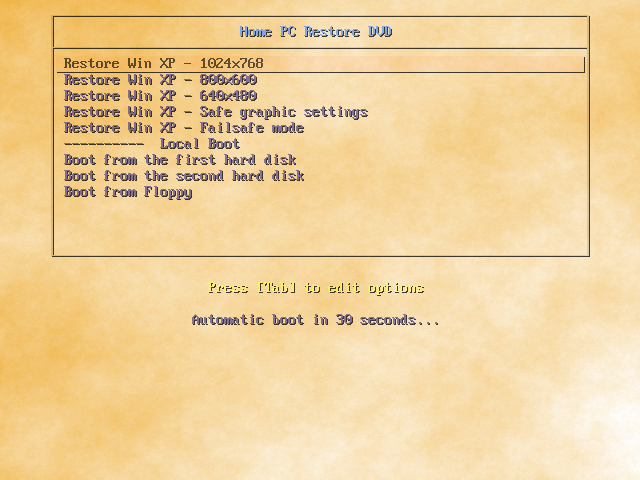
Here we can see the boot menu of the disc.
ZIP file instructions [^]
Often the image file is way too big to fit to even 8 GB DVD. Some people may also want to be able to overwrite the backup when it becomes outdated. In addition, netbooks don't have optical drives at all.
One option is using recovery thumb drive or external hard drive instead of DVD. If the external HD is big enough, the disk image can be even over a terabyte in size. Recovery USB drive can also be used on netbooks and overwritten at will.
Clonezilla Live allows creating a ZIP file instead of disk image. If you want to do so, follow this step-by-step guide.
Before creating the disk image, make sure it is split to pieces of four gigabytes or less. It is split automatically if you use Beginner mode, and if you use Expert mode, you should already know how the splitting setting can be changed.
Using GNU/Linux [^]
After creating the disk image and booting into GNU/Linux, make sure that the filesystem of the partition where you plan to put the disk image is FAT32. If you don't know the filesystem, open terminal and run this command as root:
parted -l
Note: How a command can be run as root depends on the GNU/Linux distribution you use. If it's Ubuntu or a distro based on it, simply put "sudo" above the command. For example, the above command can be executed by typing "sudo parted -l"
Note: The l in parameter -l is lowercase L, not number 1.
If your disk doesn't contain any FAT32 partition, but it contains a partition which is big enough and doesn't contain any important data, format the partition as FAT32. The command below needs root access too.
|
The command below erases all the data on the target partition. Make sure you don't format a wrong partition by accident. |
mkfs.vfat -F 32 /dev/sdc1
Note: In the command replace /dev/sdc1 with the partition you wish to format.
After formatting the partition or noticing that it was already FAT32, extract the ZIP archive to the root of the partition. Also these commands need root rights.
mount /dev/sdc1 /media/usb
unzip clonezilla-live-Backup_42-2010_sdb.zip -d /media/usb/
Note: In the last command I have assumed your image file is clonezilla-live-Backup_42-2010_sdb.zip. You will have to replace this with the actual name of the file.
ZIP package contains a script to make the USB drive bootable. Let's run it. The latter of these commands needs root access.
|
The latter of the commands below replaces the existing bootloader of the target disk, if there is one. Make sure you don't select a wrong disk by accident. |
cd /media/usb/utils/linux
./makeboot.sh /dev/sdc1
That's all. Your thumb drive or external hard drive should be now an automatic recovery disk.
Using Windows [^]
If the Windows version you use is not Vista or 7, you need to be logged in as administrator. If you're not, but you have access to an admin account, log out and then log again in as admin.
If you don't have admin rights at all, boot into SystemRescueCD (you don't need graphical mode this time) and follow the instructions for GNU/Linux. In SystemRescueCD all commands are run as root, so you don't need to add any prefix to the commands.
After creating the disk image and booting into Windows, make sure that the filesystem of the partition where you plan to put the disk image is FAT32. If you don't know the filesystem, open My Computer, right-click the partition and select Properties. Then read the "File system" column. If there reads anything but FAT32, check other partitions of the disk too, if the disk contains multiple partitions. If you have a suitable FAT32 partition, continue from this step.
If your disk doesn't contain any FAT32 partition, but it contains a partition which is big enough and doesn't contain any important data, format the partition as FAT32.
|
Formatting erases all the data on the target partition. Make sure the partition contains nothing important. |
Right-click the partition and select Format.... If the Windows version you use is Vista or 7, an UAC prompt asks for admin password. Enter it.
At the format window, choose the FAT32 filesystem. You can enter any volume label (it means the name of the partition you can see next to the partition letter) and enable Quick Format if you're in a hurry. If Quick Format is disabled, Windows checks if the partition is physically OK after formatting it. Enabling Quick Format makes the formatting process many times faster and, contrary to popular belief, hardly ever causes any harm.
After formatting the partition or noticing that it was already FAT32, extract the ZIP archive to the root of the partition. Navigate to the folder where you've saved the ZIP file and right-click it. Choose Extract all..., and when you're asked for location where the archive is extracted, enter the letter of the partition, for example H:\. Do NOT choose any folder in the partition!
After that, browse to the folder X:\utils\win32, where X: is the letter of the partition.
Then, double-click makeboot.bat. If the Windows version you use is Vista or 7, another UAC prompt appears. Enter the password again. Then just follow the prompts to make the USB drive bootable.Now you're done. Your thumb drive or external hard drive should be an automatic recovery disk.
Restoring to a different location [^]
In the past restoring to a different location was not supported by Clonezilla Live at all. Because of that, a script called reloc-img was added to Clonezilla-SysRescCD, which would help the user perform this task.
Recent versions of Clonezilla Live partly support restoring to a different location, so the reloc-img script is obsolete, and has been removed. Clonezilla Live now supports:
- Relocation of a disk image (restoring a whole disk)
- Relocation of a partition image (restoring a partition)
Clonezilla Live does not support:
- Relocation of a single partition contained into a disk image.
Imagine you have a disk backup image named hda-2009-02-02. The image contains three partitions, hda1 (operating system), hda2 (user data) and hda3 (other data).
You want to restore your other data partition (hda3), to a different system (partition sdb2) but there is no way to restore (extract) a single partition from a disk image - you can only restore the whole disk.
In order to address this situation, two new scripts have been written for Clonezilla-SysRescCD: imginfo and imgconvert
Script imginfo [^]
The script will be used to print info about existing image files.
Its help screen is:
# imginfo -h
Clonezilla Live Image Information
imginfo v. 0.2 - (C) 2009-2010 S. Georgaras <sng@hellug.gr>
Usage: imginfo <options> <directory>
Available options:
s Search in sub-directories too
i [name] Pring info for image [name]
v Print version info and exit
h Print this screen and exit
Script imgconvert [^]
The script will be used to convert an existing disk or partition image file to a new partition image file.
imgconvert can create two type of images:
- Temporary image
This type of image is created by linking the data files of the existing disk image to the new partition image. This means that the original image must be present for the new image to be used. This is the default image type created by imgconvert. - Permanent image
This type of image is created by copying the data files from the existing disk image to the new partition image. This means that the original image is not needed in order to use the new one. Permenant image files are created using the command line parameter -p.
Its help screen is:
# imgconvert -h
Clonezilla Live Image Conversion
imgconvert v. 0.2 - (C) 2009-2011 S. Georgaras <sng@hellug.gr>
Usage: imgconvert <options> [image] [partition] <new partition>
Parameters are:
[image] Disk image to be converted to partition image
[partition] Partition name to convert. It must be a valid device name
Available options:
o [image] Save new imag as [image]
p Save new partition instead of making a link to the old one
v Print version info and exit
h Print this screen and exit
Using the scripts [^]
Restoring to a partition [^]
After booting into Clonezilla Live, I select
Enter_shell Enter command line prompt
when the menu is displayed and then I press 2 to exit to the shell.
At this point I will mount my images partition (in this example /dev/sdc4), and use script imginfo to get info about my image files.
$ sudo su -
# mount /dev/sdc4 /home/partimag
# cd /home/partimag
# imginfo
Image files found in: /home/partimag
Image: usb250-img, disk: sda, size: 259MB, parts: 1
part: sda4, size: 247.00MB, type: FAT16
Image: sys-bck, disk: hda, size: 320.0GB, parts: 3
part: hda1, size: 22.36GB, type: Linux
part: hda2, size: 39.06GB, type: Linux
part: hda3, size: 233.87GB, type: Linux
As you can see there are two disk images under /home/partimag: usb250-img and sys-bck.
sys-bck is a backup of my old system, which had three partitions. What I need to do now is "copy" the hda3 partition to my current system, by transfering its data to partition sdb2.
The way to proceed is:
- Create a new partition image (containing hda3's data) based on the existing disk image file, by executing the command:
# imgconvert sys-bck hda3 sdb2
This command will create a temporary partition image file (automatically named sys-bck-cnv), which contains sdb2 only, as you can see by executing:
Clonezilla Live Image Conversion
imgconvert v. 0.2 - (C) 2009-2011 S. Georgaras
Determining input image
Input image: "/home/partimag/sys-bck"
Validating image... ok
Determining input partition
Input partition: "hda3"
Validating input partition... ok
Determining output image
Output image: "/home/partimag/sys-bck-cnv"
Validating output image... ok
Checking permissions... ok
Determining output partition
Output partition: "sda2"
Validating output partition... ok
Creating output image: /home/partimag/sys-bck-cnv
Linking files... done
Fixing info files... done# imginfo -i sys-bck-cnv
Image: sys-bck-cnv, part: sdb2, size: 233.87GB, type: Linux - Restart Clonezilla Live by pressing Control-D twice.
- Restore the new image file into sdb2, by selecting
Screen 1: Start_Clonezilla Start Clonezilla
Screen 2: device-image disk/partition to/from image
Screen 3: skip use existing /home/partimag
Screen 4: Beginer / Expert
Screen 5: restoreparts Restore_an_image_to_local_partition
and continue as usual to restore the partition.
Converting image files [^]
# imgconvert -p -o other_data sys-bck hda3 sdb2
Clonezilla Live Image Conversion
imgconvert v. 0.2 - (C) 2009-2011 S. Georgaras
Determining input image
Input image: "/home/partimag/sys-bck"
Validating image... ok
Determining input partition
Input partition: "hda3"
Validating input partition... ok
Determining output image
Output image: "/home/partimag/other_data"
Validating output image... ok
Checking permissions... ok
Determining output partition
Output partition: "sda2"
Validating output partition... ok
Creating output image: /home/partimag/other_data
Copying files... done
Fixing info files... done
# imginfo -i other_data
Image: other_data, part: sdb2, size: 233.87GB, type: Linux
# ls -la sys-bck
total 1111972
drwxr-xr-x 2 root root 4096 2007-11-22 03:21 .
drwxr-xr-x. 34 root root 4096 2009-04-06 21:28 ..
-rw-r--r-- 1 root root 4 2007-11-20 20:33 disk
-rw-r--r-- 1 root root 1081716736 2007-11-20 20:32 hda1.aa
-rw-r--r-- 1 root root 45453312 2007-11-20 20:33 hda2.aa
-rw-r--r-- 1 root root 10317824 2007-11-20 20:33 hda3.aa
-rw-r--r-- 1 root root 37 2007-11-21 18:56 hda-chs.sf
-rw-r--r-- 1 root root 37 2007-11-21 18:50 hda-chs.sf.orig
-rw-r--r-- 1 root root 512 2007-11-20 20:31 hda-mbr
-rw-r--r-- 1 root root 259 2007-11-21 18:59 hda-pt.sf
-rw-r--r-- 1 root root 259 2007-11-21 18:50 hda-pt.sf.orig
-rw-r--r-- 1 root root 15 2007-11-20 20:33 parts
-rw-r--r-- 1 root root 17 2007-11-20 20:33 swappt-hda4.info
#
#
# ls -la other_data
total 24
drwxr-xr-x 2 root root 4096 2009-04-06 21:27 .
drwxr-xr-x. 35 root root 4096 2009-04-06 21:27 ..
-rw-r--r-- 1 root root 5 2009-04-06 21:27 parts
-rw-r--r-- 1 root root 10317824 2009-04-06 21:27 sdb2.aa
-rw-r--r-- 1 root root 37 2009-04-06 21:27 sdb-chs.sf
-rw-r--r-- 1 root root 106 2009-04-06 21:27 sdb-pt.sf
Booting a restored Linux system [^]
A Linux system that has been restored to a new disk/partition, is usually not ready to be booted right after the restoration procedure is finished.
There are two more steps that you may have to take:
- Fix /etc/fstab
- Reinstall GRUB.
I will assume GRUB is your boot manager, as it is the usual case nowadays.
For this example I will assume that you have restored a Linux system (that used to be in sdb), to a new disk (hda), and that it contains three partitions, / (the root partition), /home (user's partition) and a swap partition. You must be really careful here, as the name of the new disk depends on the system to be booted. If it uses one of the newest Linux kernels (using the libata disk driver), ALL your disks will be recognised as SCSI. More info: "Identifying devices in Linux" section "SCSI disks when there are none!!!".
This is what we have:
root partition home partition swap partition
Old system /dev/sdb1 /dev/sdb2 /dev/sdb3
New system /dev/hda1 /dev/hda2 /dev/hda3
Fixing /etc/fstab [^]
Since we are still in Clonezilla Live, right after the restore procedure has finished, we will use it to mount our restored root partition, and edit its /etc/fstab. We issue the commands:
mkdir /new-root
mount /dev/hda1 /new-root
vi /new-root/etc/fstab
The contents of /etc/fstab could be something like
/dev/sdb1 / reiserfs acl,user_xattr 1 1
/dev/sdb2 /home reiserfs defaults 1 2
/dev/sdb3 swap swap defaults 0 0
and we have to change ti to
/dev/hda1 / reiserfs acl,user_xattr 1 1
/dev/hda2 /home reiserfs defaults 1 2
/dev/hda3 swap swap defaults 0 0
Finally, we unmount the partition, and we are ready to reboot
umount /new-root
reboot
Reinstalling GRUB [^]
When Clonezilla-SysRescCD menu appears, we select Tools > Super Grub Disk
Then we select Super Grub Disk > Super Grub Disk (WITH HELP) > English Super Grub Disk > Gnu/Linux > Fix Boot of Gnu/Linux (GRUB). From this entry we will be able to reinstall GRUB to our hard disk.
You may also want to have a look at Super Grub Disk "documentation".
Fixing boot problems [^]
Boot problems are probably the most feared computer problems. Without an operating system you can't access your data, get the work done or even google for help. That's why it's often a good idea to have an alternative operating system available for searching help if the main OS doesn't work. Also a copy of Clonezilla-SysRescCD can be invaluable help.
Actually, the initial reason why I (Jyrki) installed GNU/Linux at all was that I wanted to be able to fix Windows boot problems if they occur. I installed both GNU/Linux and GRUB to my external hard drive, completely separating operating systems. Even if either bootloader stopped working, I'd still be able to boot one of my OSes.
But such configuration is not easy to create, and when I installed GNU/Linux, I knew very little about it. If I didn't read the instructions I found here and there very carefully, I probably would have done a common mistake: installing GRUB to my internal hard drive. Such mistake would have caused two problems:
- Inability to boot GNU/Linux at any computer expect the one which was used for installing
- Inability to boot Windows when the external drive isn't connected
In this page, I simulate that situation in a virtual machine and fix both problems.
Symptoms [^]
What happens when I try to boot the external hard drive on another computer depends on the BIOS of the computer. For example, on my computer I see a Black Screen of Death when I try booting from a disk with empty Master Boot Record. Other BIOSes may boot the local operating system or display an error message (for example "Disk boot failure", "Missing operating system" or "Operating system not found").
The other problem is very easy to determine. When external drive is disconnected and I try to boot, I'll see this:
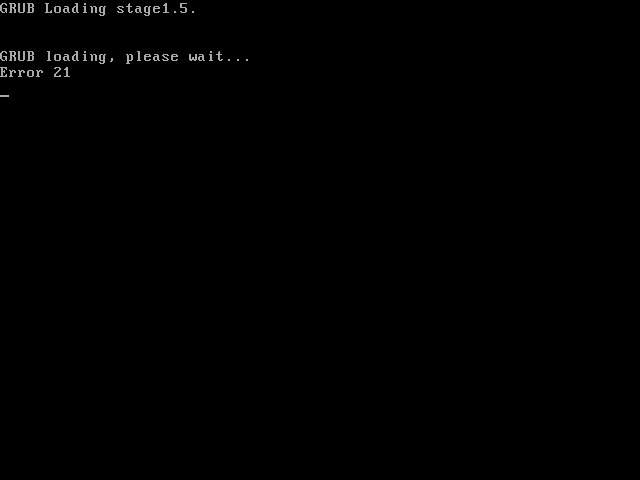
Goals [^]
Because I still want to separate my operating systems completely, I try to restore NTLDR to the Master Boot Record of the internal disk, if possible. If that's not possible, I install there another bootloader that chainloads Windows.
I could reinstall GNU/Linux completely and make sure that the GRUB is installed to the right disk this time, but it's not a good idea if I only need to overwrite the first 446 bytes (yes, bytes, not kilo- or megabytes) of the disk. So, I only install GRUB to the external disk, by using Super Grub Disk.
Your problem (if you have one at all) most likely is different, but goals are often the same.
You need to restore NTLDR if you...
- ...just installed GNU/Linux, but the boot menu doesn't mention Windows at all. You're not willing to learn how Windows can be added to the boot menu, you just need to make your computer to boot Windows again right now.
- ...cloned your Windows partition to your brand new computer but didn't clone the Master Boot Record.
- ...are about to uninstall GNU/Linux and aren't willing to use GRUB as your bootloader.
You need to install GRUB if you...
- ...just installed Windows and want to make GNU/Linux bootable again.
- ...cloned your GNU/Linux partition to your brand new computer but didn't clone the Master Boot Record.
- ...just installed GNU/Linux but installed GRUB to a non-first hard drive by accident. (The symptom is that your computer still boots to the operating system you had installed already.)
|
The following pressentation has been made using Super Grub Disk v0.9799 |
Restoring NTLDR [^]
There are a lot of ways to restore NTLDR. However, sometimes there is no legal way to restore it, and I'm NOT telling about the illegal ones. The last resort is using syslinux to chainload Windows; there is usually no way to notice that syslinux is used instead of NTLDR.
I've listed here the most important options in order I'd use them.
Restoring NTLDR from a backup [^]
If you've been smart enough to use Clonezilla Live to create a disk image of your first hard drive, it's very easy to restore NTLDR.
Your NTLDR is safe in a file called hda-mbr or sda-mbr. You can use dd to overwrite your existing Master Boot Record.
|
Don't restore all 512 bytes of your Master Boot Record. The MBR contains your partition table and restoring it after repartitioning your disk erases all the data on the disk. |
If you normally use GNU/Linux, open terminal and run these commands as root:
mount /dev/sdc1 /mnt/usb
dd if=/mnt/usb/Backup/sda-mbr of=/dev/sda bs=446 count=1
Note: In the commands I have assumed that your first hard drive is /dev/sda and that your disk image resides in the folder Backup in partition /dev/sdc1. You will have to replace them with the correct pieces of information.
Note: How a command can be run as root depends on the GNU/Linux distribution you use. If it's Ubuntu or a distro based on it, simply put "sudo" above the command. For example, the latter of the above commands can be executed by typing "sudo dd if=/mnt/usb/Backup/sda-mbr of=/dev/sda bs=446 count=1"
If you normally use another operating system, boot into SystemRescueCD and run the above commands. In SystemRescueCD all commands are run as root, so you don't need to add any prefix to the commands.
If you don't know the name of the partition, run this command as root:
fdisk -l
It tells how many hard drives you have, how many partitions they contain and what filesystems the partitions use. If you know, for example, that the disk where you've saved the disk image contains only one partition, look for such disks.
Using Bootrec.exe (Windows Vista/7 only) [^]
You need Windows Vista/7 install disc for this. If you don't have one (for example, if you bought a laptop that was bundled with preinstalled Windows and manufacturer's recovery disc), download a recovery disc from here.
Then boot from the disc.
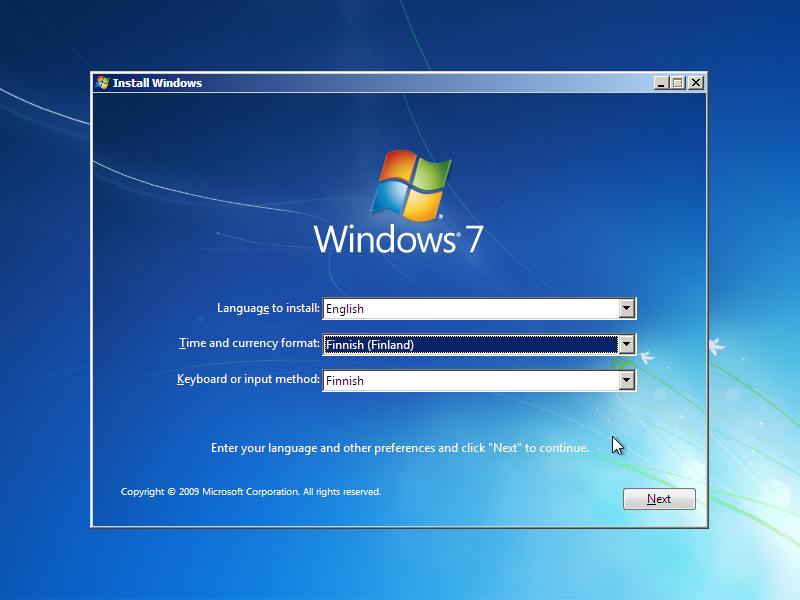
After selecting language, time, currency and keyboard, click Next.
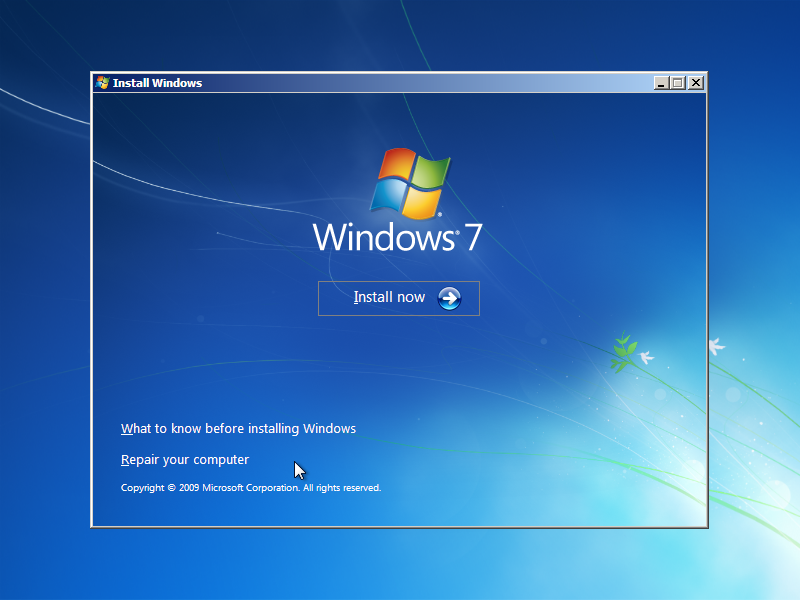
Click Repair your computer.
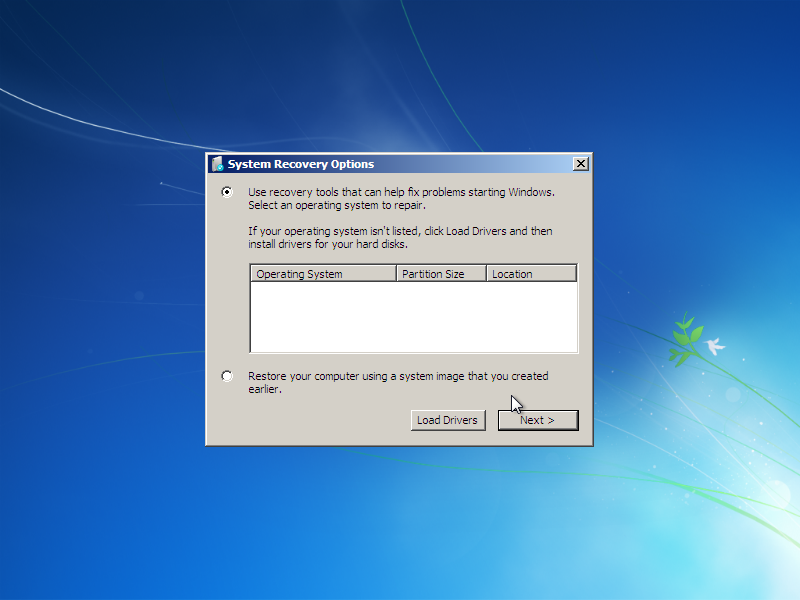
Choose the option Use recovery tools that can help fix problems starting Windows and click Next.
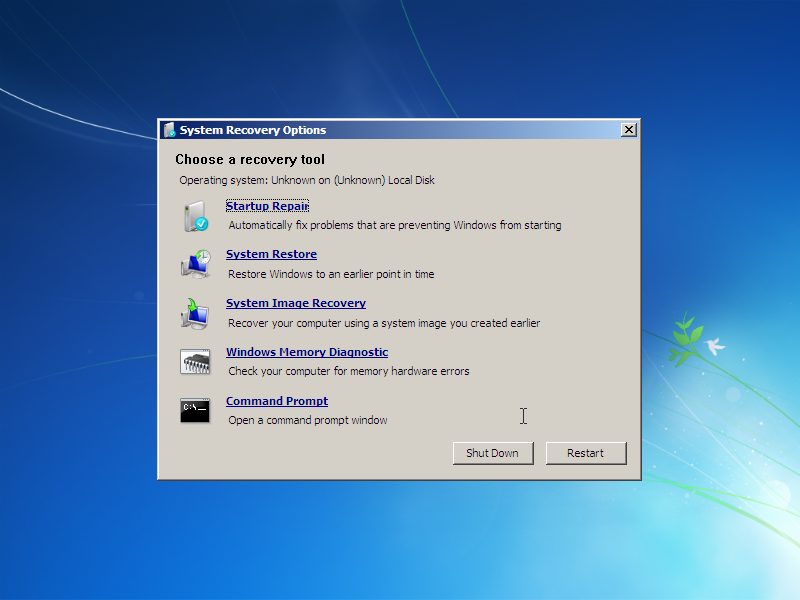
You'll see a dialog box named System Recovery Options. Click Command Prompt.
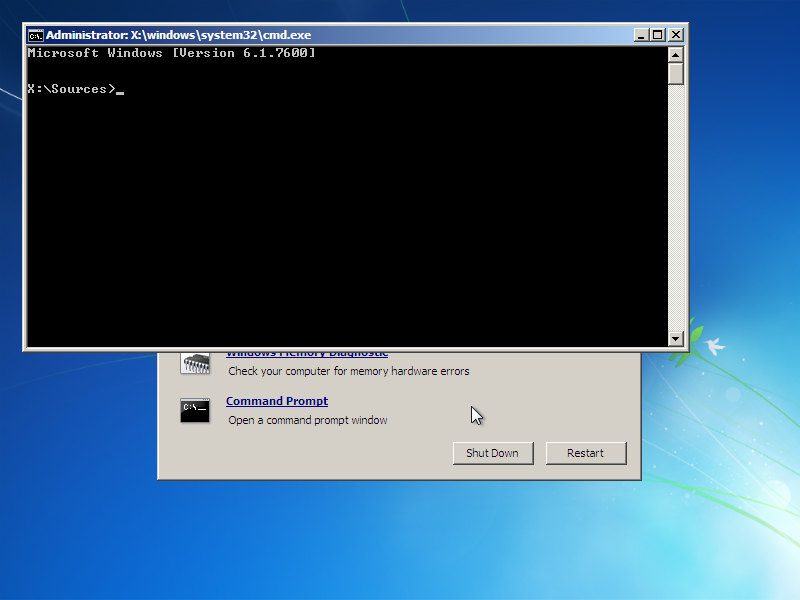
Then you only need to execute one command:
Bootrec /FixMbr
Note: The command is case-insensitive. You can type, for example, "bootrec /fixmbr".
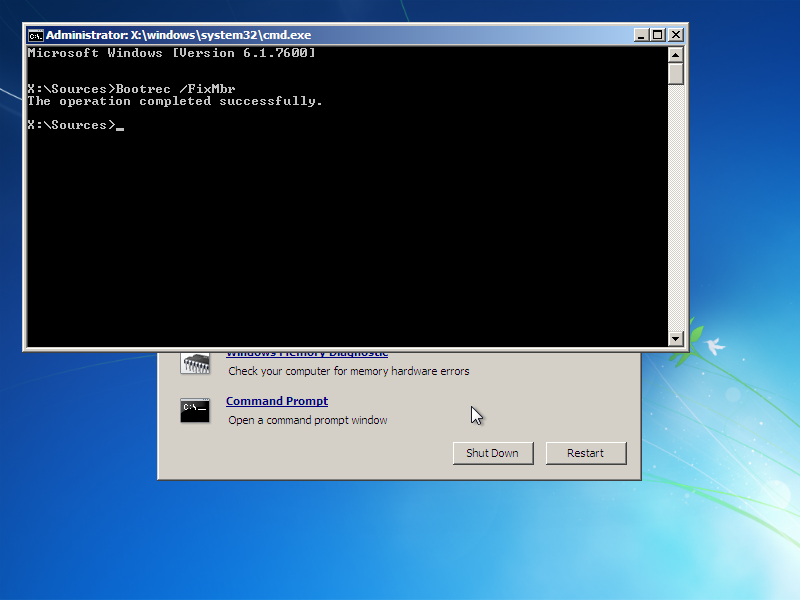
Using FIXMBR (Windows XP only) [^]
You need Windows XP install disc. Boot from it, and when you see the screen "Windows XP Home Edition Setup" or "Windows XP Professional Setup", press R to enter the Recovery Console. Then choose the Windows installation you want to log onto. If you have only one copy of Windows installed, press 1 and ENTER. After that, enter the administator password and press ENTER.
There is only one command to run:
FIXMBR
Note: The command is case-insensitive. You can type, for example, "fixmbr".
Using FDISK (Windows 95/98/Me only) [^]
For this, you need a floppy drive. You also need to run a Windows-only program, so your first challenge is to boot Windows without NTLDR.
Don't worry, Super Grub Disk makes it possible. Boot into it.
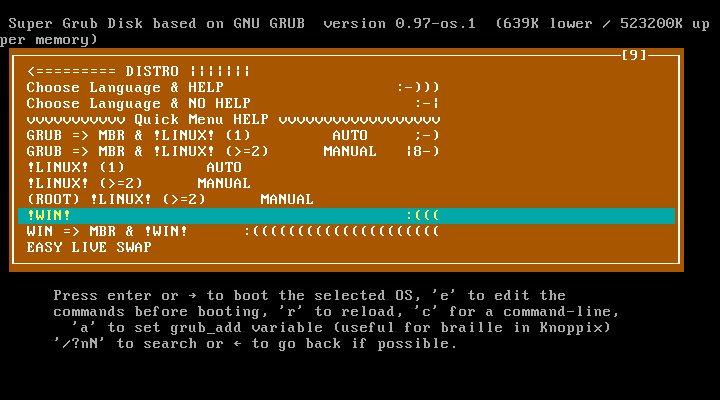
Just choose the option "!WIN! :(((" and press ENTER.
When you have Windows up and running, download the boot disk image appropriate to your version of Windows from Bootdisk.Com. Then put a floppy to your floppy drive.
If the floppy isn't already formatted, open My Computer, right-click the floppy drive and select Format....
At the format window, choose the capacity of 1,44 megabytes and Full format type. You can enter any label (it means the name of the floppy you can see next to the floppy drive letter) and disable the summary if you wish. Keep the Copy system files option disabled.
When you have a formatted floppy in your drive, double-click the boot disk image you downloaded. When it's done, shut Windows down and check your BIOS settings to be able to boot from the floppy. Some BIOSes contain a boot menu, others require editing settings pernamently. Details can be found on the manual of the motherboard or laptop.
Then boot from the floppy. When you're given three boot options, choose the option 2. Start computer without CD-ROM support. Wait a moment to enter command line and run this command:
FDISK /MBR
Note: The command is case-insensitive. You can type, for example, "fdisk /mbr".
Installing syslinux using Super Grub Disk [^]
The above four are the only legal ways I know to restore NTLDR to the Master Boot Record. Unfortunately, sometimes none of them can be used. If that's the case, it's time to switch bootloader. GRUB can be configured to chainload Windows, and usually it even does that automatically, but this page isn't intended to help configuring GRUB. I assume that if you're primarily a Windows user and reading this page, you don't want to learn how to use GNU/Linux, you just want to make Windows bootable again.
Maybe the easiest way to do so is installing syslinux using Super Grub Disk. Super Grub Disk configures it automatically to chainload the first active partition. The partition should contain Windows, Windows can't boot if its partition isn't active.
Boot into Super Grub Disk.

Choose the option "WIN => MBR & !WIN! :(((((((((((((((((((((" and press ENTER. Windows will be booted automatically right after installing syslinux.
Installing GRUB [^]
Contrary to various ways to restore NTLDR, there is only one way to install GRUB I recommend. That's Super Grub Disk, because it contains GRUB no matter what has happened to the hard drive(s). First, I boot into it.
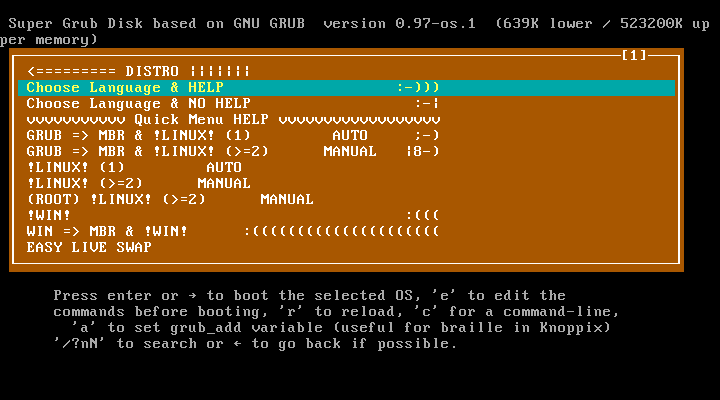
I select "Choose Language & HELP :-)))" and press ENTER.
Screen "S.G.D. Language Selection." [^]
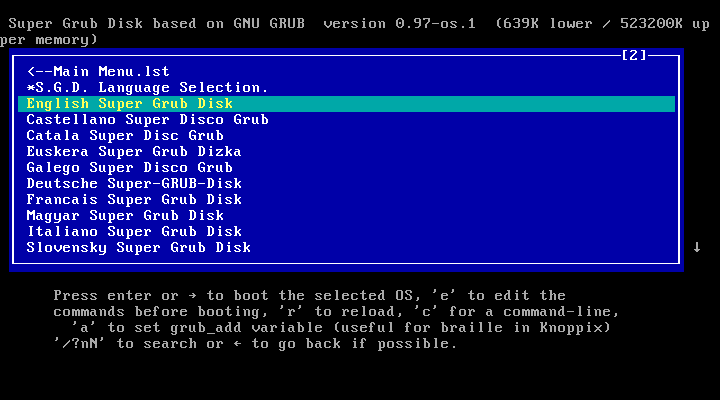
I select "English Super Grub Disk" and press ENTER.
I press ENTER...
...and then ENTER again...
...and then ENTER once again...
...and finally ENTER one more time.
Screen "English Super Grub Disk (Help)" [^]
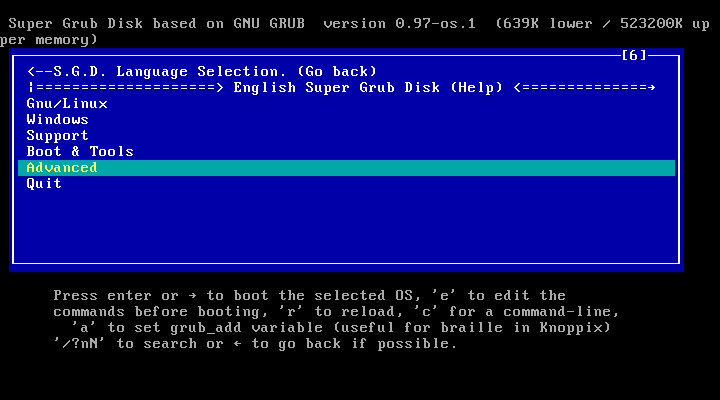
I select "Advanced".
Screen "Advanced (Help)" [^]
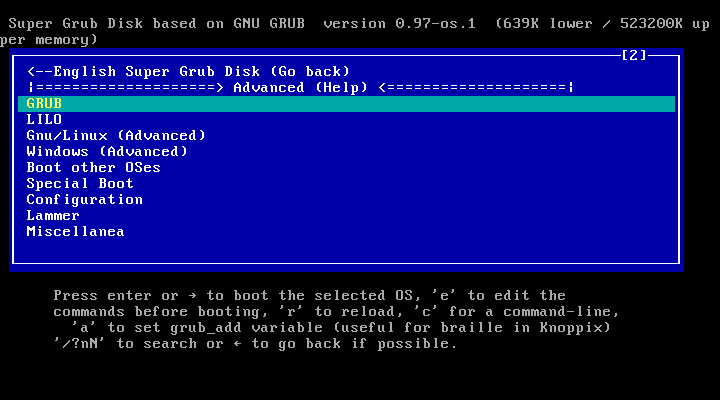
I select "GRUB" and press ENTER.
Screen "GRUB (Help)" [^]
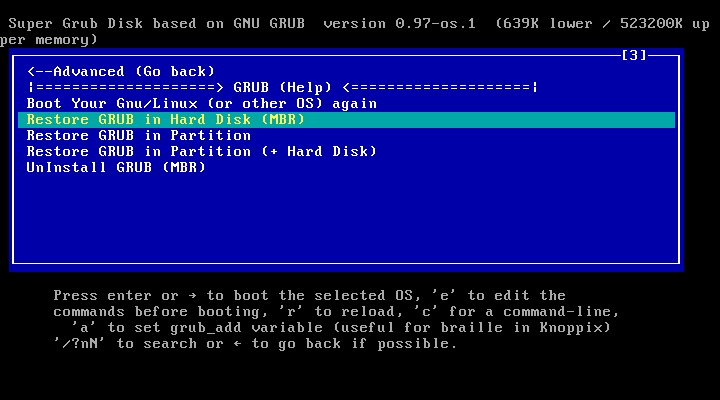
I select "Restore GRUB in Hard Disk (MBR)" and press ENTER...
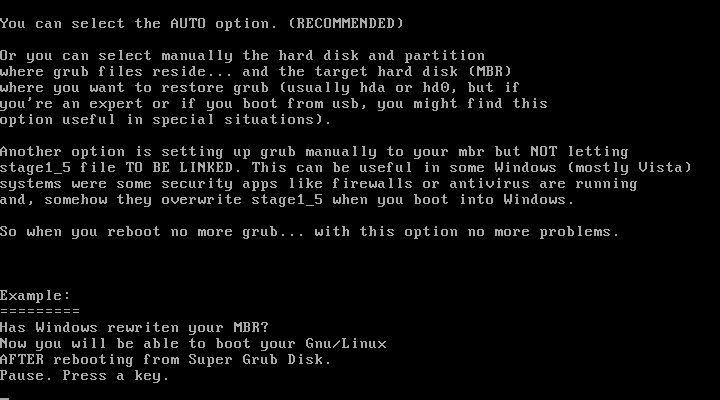
...and ENTER.
Screen "Restore GRUB in Hard Disk (MBR) (Help)" [^]
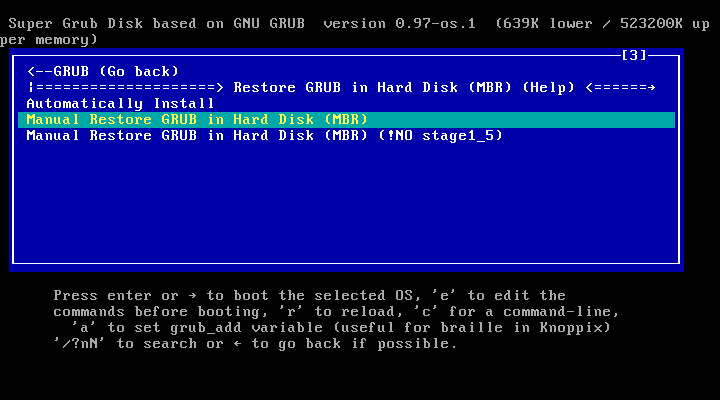
I select "Manual Restore GRUB in Hard Disk (MBR)" and press ENTER. If you want to install GRUB to the Master Boot Record of the first hard drive, "Automatically Install" is a better choice. If you don't know if you want GRUB to the first or some other disk, you most likely want it to the first disk.
Screen "Manual Restore GRUB in Hard Disk (MBR) (Help)" [^]
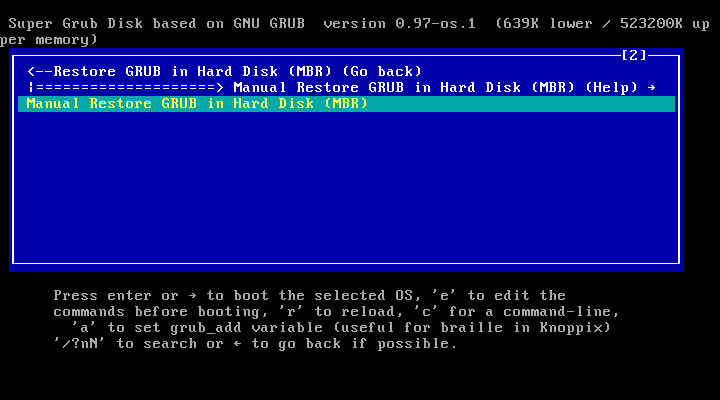
I confirm my decision by selecting "Manual Restore GRUB in Hard Disk (MBR)" again and pressing ENTER.
Screen "Partition of GRUB" [^]

In this screen I can select the disk that contains the partition that contains the files needed by GRUB. In this case, that disk is the external hard drive. As you can see, the disk is only three megabytes in size - because the computer used for screenshots is still virtual. Actually, the "disk" where I'm installing GRUB is just a file.
Next Screen [^]
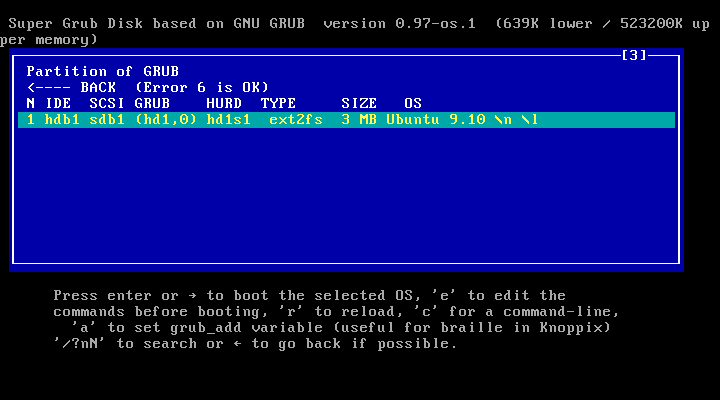
This is where I choose the partition where GRUB files reside. This disk contains only one partition.
Screen "Restore to MBR of Hard Disk" [^]
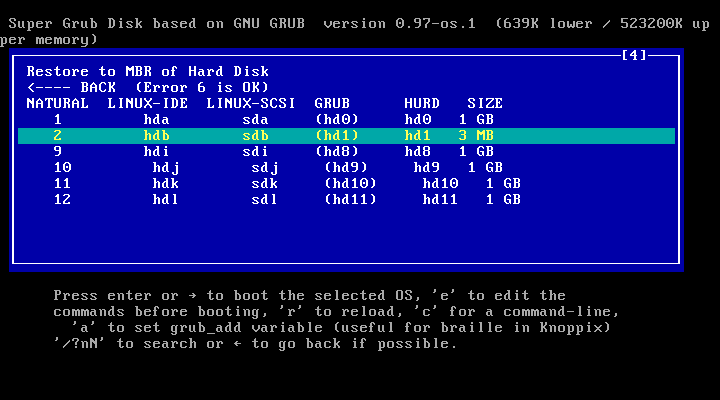
I select the external hard drive to install GRUB to its Master Boot Record.
Some text scrolled in the screen (too fast to read or take a screenshot) and I was back at this screen. I rebooted the computer. (In this situation, you can safely do a "hard reboot" by pressing reset button once or power button twice.)
GRUB booted successfully.